
Ever held your breath while clicking 'update' on a critical plugin? We’ve all been there. A WordPress staging site is the safety net that finally lets you exhale.
Think of it as a private, identical twin of your live website. It’s a place where you can test everything—from a simple plugin update to a complete theme redesign—without a single visitor ever knowing.
Why a Staging Site Is Your Website's Best Friend
A staging site is less of an "insurance policy" and more of a professional requirement, especially for e-commerce stores. Before you roll out any changes on your live shop, you absolutely need to test them in a separate environment to avoid costly disruptions. This is non-negotiable for anyone using powerful tools like WooCommerce.
The whole idea is beautifully simple: create a clone of your site in a private, password-protected space. This replica gives you the freedom to work, hunt down bugs, and perfect new designs without any risk to your live site’s performance or reputation.
Once you’re confident that your changes are solid, you just "push" them to the live site. Simple as that.
The Real-World Impact
Imagine you're running a huge Black Friday sale. You update a minor plugin, and suddenly, it breaks your entire checkout process. Every minute of downtime is a direct hit to your revenue and a major blow to customer trust.
A WordPress staging site prevents this nightmare scenario from ever happening. You would have caught that plugin conflict in your safe testing environment, saving your sales and your sanity.
WordPress powers a staggering 43.4% of all websites on the internet. With such a massive footprint, it’s no surprise that professional developers and agencies rely on staging to maintain quality. In fact, over 70% of web professionals in North America and Europe use staging sites to prevent errors.
So, What Can You Actually Test on a Staging Site?
Your staging environment is your personal sandbox. It’s built for tinkering. Here are a few common things I test all the time:
- Plugin and Theme Updates: Make sure that shiny new update doesn’t clash with your existing setup.
- New Features: Safely add new functionality, like a booking system or a customer portal, without breaking what already works.
- WordPress Core Updates: Major WordPress releases can occasionally cause headaches. It's always best to test them first.
- Complete Redesigns: Overhaul your site's entire look and feel without your audience watching the messy "work in progress."
The bottom line is this: by isolating changes from your live site, you create a buffer against the unexpected. This isn't just a best practice; it's a fundamental part of managing a website responsibly.
In this guide, I'll walk you through the most effective ways to set up and manage your own staging site, covering everything from one-click hosting solutions to the more hands-on manual methods.
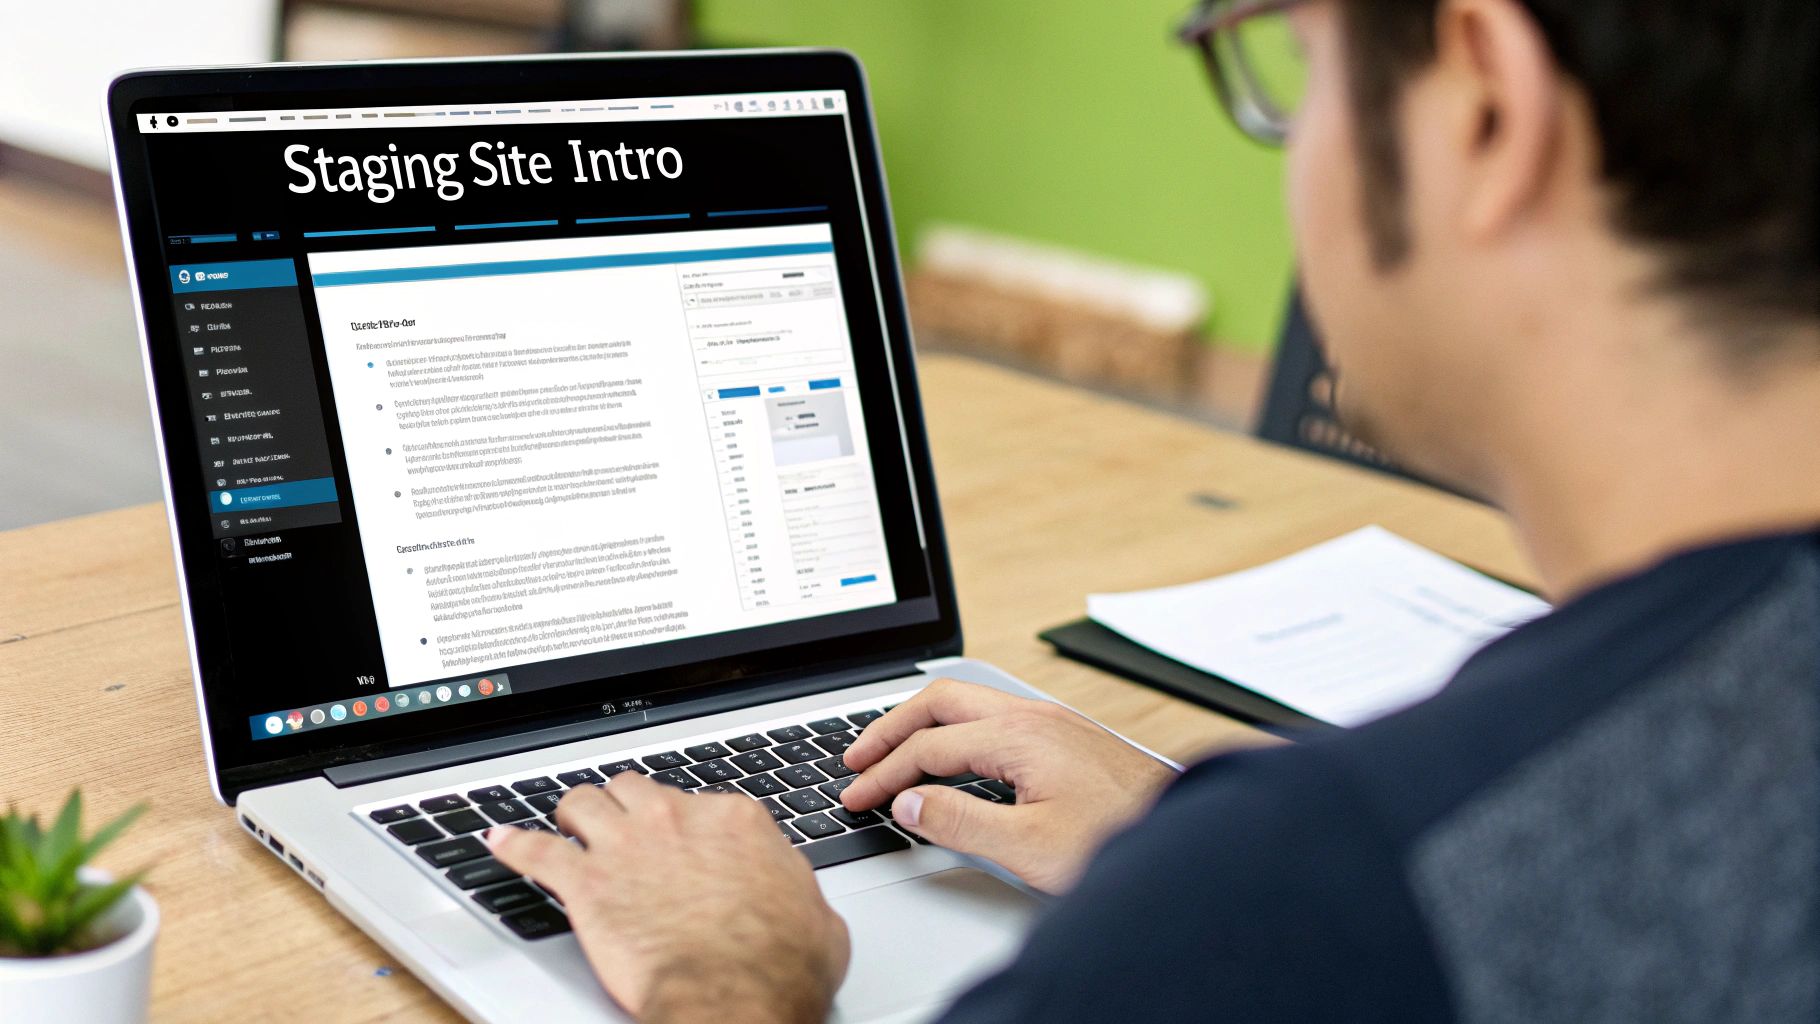
Using Your Host’s One-Click Staging Feature
For a lot of us, the easiest way to create a WordPress staging site is to just use the tool your hosting provider already gives you. Most premium managed WordPress hosts know that their customers need a safe place to test changes without breaking their live site. As a result, one-click staging has become a standard feature, not some expensive add-on.
This whole approach just cuts out all the technical grunt work. Forget about manually copying files with FTP or trying to duplicate a database. You just log into your hosting dashboard, find the staging button, and click it. In a few minutes, your host spins up a perfect, private copy of your live website on a temporary, secure subdomain.
This screenshot from a popular host’s dashboard shows exactly how straightforward it is. The process really just comes down to picking your site and clicking a single button. The biggest win here is how seamless it is; the system handles the environment setup, data copying, and all the behind-the-scenes configuration for you.
The Core Benefits of Hosted Staging
Using your host’s built-in tool is about more than just convenience—it helps you build a much more professional and reliable workflow. The main advantages are pretty clear:
- Speed: You can go from thinking, "I need a staging site," to having a fully working one in less than 15 minutes. It’s the fastest and most direct method out there.
- Security: The staging environment is automatically kept separate from your live site and is usually password-protected. Hosts also make sure it’s invisible to search engines, which stops you from getting hit with SEO penalties for duplicate content.
- Simplicity: The whole thing is managed through a simple, user-friendly interface. You don’t need to know anything about FTP, databases, or editing
wp-config.phpfiles.
This hassle-free process is why top managed hosts like WP Engine, Kinsta, and SiteGround see 80–90% of their customers using their staging features. It's a proven method. In fact, case studies show that using a staging site can slash critical site errors by up to 60%, which is a huge deal for any business, but especially for e-commerce stores. You can find more stats like this over at DesignRush.com.
Pro Tip: Before you touch anything, always refresh your staging site from the live environment. This pulls down the latest version of everything—new blog posts, recent user comments, or sales data—so you’re not working with outdated content.
Pushing Your Changes Live
Once you’ve tested your new theme, plugins, or other updates on the staging site and you're happy with how everything works, the next step is to deploy them. This is where hosted staging really shows its power. The "push to live" feature is basically the creation process in reverse.
With another click, the system intelligently merges the changes from your staging environment over to your live production site. Most modern hosts even offer a "selective push," which lets you choose if you want to push only the files, only the database, or both. This is incredibly helpful. For instance, you might have gotten new orders on your live store while you were busy changing theme files in staging. While this one-click process is powerful, you can find a more detailed breakdown in our complete guide on how to create a WordPress staging site.
After you push your changes to the live site, it's really important to do a quick check to make sure everything went smoothly:
- First, clear all your caches—server, plugin, and your own browser's cache.
- Now, visit your live site and confirm your changes are actually there.
- Click through your main navigation and test key functions like contact forms or the checkout process.
- Finally, check your permalinks by visiting a few different pages and posts to make sure they aren't broken.
Building a Staging Site with a WordPress Plugin
So, what if your hosting plan doesn't come with a slick, one-click staging feature? Don't worry, you’re not stuck. A dedicated plugin can bring that essential functionality to just about any WordPress setup. This is a real game-changer, especially for sites on shared hosting or plans that are a bit light on features.
Plugins like WP Staging or BlogVault work by creating a complete clone of your site. This copy lives in a subdirectory right on your server, effectively building a self-contained testing sandbox that's totally separate from your live site. It’s a pretty smart way to get all the benefits of a hosted staging environment without having to switch providers.
This simple three-part strategy is the core of how plugin-based staging works.
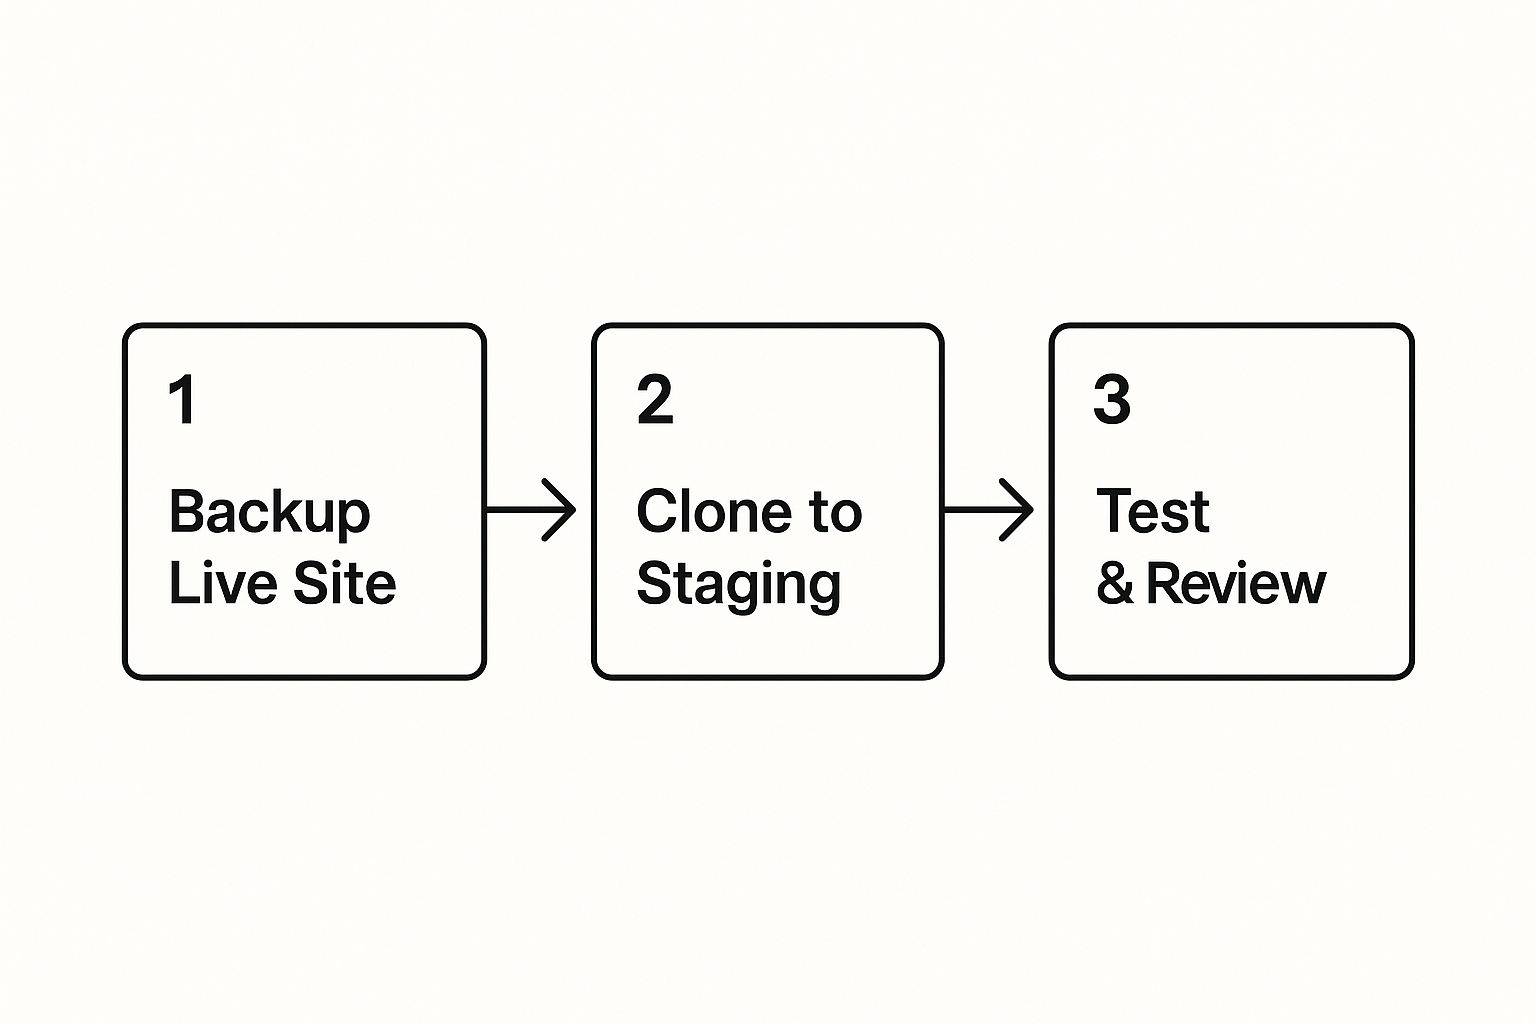
The workflow really highlights the central idea of a wordpress staging site: safety first. You back up, then you clone. This gives you a perfect replica for testing and ensures your live site stays stable and untouched no matter what you're working on.
Getting Started with a Staging Plugin
The whole process is surprisingly easy. You just install a plugin like WP Staging straight from your WordPress dashboard.
Once it's activated, the plugin walks you through creating the staging site. Honestly, it's usually as simple as giving your staging environment a name and clicking a button to get the cloning process started. The plugin handles all the heavy lifting, meticulously copying your files and database into a new, private subfolder.
The biggest win here is accessibility. You don't need to mess with FTP or have any clue how to manage a database. Everything happens right inside the familiar WordPress admin area, which is a massive plus for anyone who isn't super technical.
When it’s done, you'll get a unique link to your new staging site. Most plugins also add a brightly colored admin bar at the top of the screen to make it painfully obvious you're in the testing environment—a great visual cue to stop you from accidentally editing your live site.
Practical Considerations and Potential Downsides
While using a plugin is a fantastic solution, it’s not without a few things to keep in mind. Because the staging site is on your own server, it uses up your storage space and server resources like CPU and RAM. If you're on a tight, resource-limited shared hosting plan, running complex tests could potentially slow down your live site.
Here are a few things I always tell people to watch out for:
- Server Resources: The cloning process itself can be pretty demanding. I always recommend running it during off-peak hours when your site has less traffic to avoid any impact on performance.
- Storage Space: A staging site is a full copy, so it will basically double the disk space your WordPress installation takes up. Before you do anything, check your hosting plan’s storage limits.
- Push-to-Live Functionality: This is a big one. Many free staging plugins will let you create a staging site just fine, but they'll ask you to upgrade to a premium plan to push your changes back to the live site. If you’re planning on making more than just a few minor tweaks, the premium version is almost always worth the investment.
In the end, this method is a lifeline for users on shared hosting or for anyone who just wants a simple solution that lives inside their WordPress dashboard. It makes creating a safe wordpress staging site possible for everyone, giving you a powerful tool to test updates, new themes, or custom code without putting your business at risk.
The Manual Approach for Maximum Control

If you're a developer or just a hands-on type of person who wants total command over your workflow, this is for you. The manual method means skipping the automated tools and plugins entirely, putting you squarely in control. It offers the most flexibility, but it demands real attention to detail and some comfort working with the guts of a WordPress installation.
While one-click solutions are undeniably convenient, they often obscure what's happening under the hood. When you build a wordpress staging site by hand, you demystify the process and gain a much deeper appreciation for how your site actually works. This is all about precision.
The Core Manual Workflow
At its heart, the manual process is about creating a perfect, working clone of your live site in a completely separate environment. This is usually done on a subdomain—think staging.yourwebsite.com—to best replicate the conditions of your live server.
I typically break this whole process down into three main stages:
- Duplicating Files: This means copying every single WordPress file and folder from your live site over to the new staging area.
- Cloning the Database: You'll export your live database and then import it into a brand new, empty database dedicated to the staging site.
- Configuration & Cleanup: Finally, you connect the new files to the new database and, crucially, make sure every internal link points to the staging URL instead of the live one.
Let me be clear: this hands-on approach isn't for the faint of heart. If you miss a single step, especially during the database configuration, you can easily end up with a broken staging site. In a worst-case scenario, you could even make unintended changes to your live site.
Setting Up Your Environment
First things first, you need to carve out a dedicated space for your staging site. This almost always starts in your hosting control panel (like cPanel or Plesk), where you’ll create a new subdomain. This action creates a new, publicly accessible directory on your server that’s isolated from your main public_html folder.
With the space ready, it's time to copy your site's files. Using an FTP client like FileZilla or your host’s built-in File Manager, you'll connect to your server and download the entire wp-content folder from your live site. This folder is the DNA of your site—it holds your themes, plugins, and all your media uploads. You'll then upload this complete folder into the new subdomain's directory.
Crucial Tip: While you can copy all the WordPress core files, I've found it’s often cleaner to install a fresh copy of WordPress on the subdomain first. Then, you just upload your
wp-contentfolder. This ensures you’re starting from a clean slate.
Managing the Database and Configuration
This is the most critical part of the whole operation, where things can go wrong if you're not careful. You'll need to get into your live database, usually through a tool like phpMyAdmin. From there, you export it as a .sql file. Then, you'll import that file into a new, completely empty database you've created for the staging site.
Once the files and database are in their new homes, the final step is to make them talk to each other. You have to edit the wp-config.php file inside your staging directory. In that file, you'll update the database name, username, and password to match the new staging database credentials you just created.
But just connecting the database isn't the end of it. Your cloned database is still full of URLs pointing back to your live domain. You have to perform a "search and replace" operation on the database to change all instances of yourwebsite.com to staging.yourwebsite.com. This is a vital step to ensure that all internal links, image paths, and site settings point to the staging environment correctly. Trying to update these URLs one by one is a nightmare, which is why most developers use a script or a dedicated plugin just for this task.
Speaking of a streamlined routine, it's a good idea to learn how to safely update WordPress plugins, as this knowledge complements the manual staging process perfectly.
Mastering Your Staging and Deployment Workflow
Having a WordPress staging site is a great start, but it's only half the story. The real trick is how you use it. A disciplined workflow transforms your staging environment from a simple copy into a professional safety net for your live website, preventing those heart-stopping, real-time disasters.
The single most important habit to build? Always refresh your staging site from the live site before you start any new work. I can't stress this enough. Your live site is a living thing—new blog posts go up, customers place orders, users leave comments. If you start making changes on an old copy, you're setting yourself up for a world of hurt when you try to push your work live, potentially overwriting all that new data.
The Developer's Pre-Deployment Checklist
Before you even think about pushing changes live, you need a solid, repeatable testing checklist. This isn't just about checking if your shiny new feature works; it's about making sure you didn't break something else in the process. We've all been there.
Here's a good starting point for your own checklist:
- Core Functionality: Can people still use your contact forms? Can users log in and out? Test any custom features that are essential to your site's purpose.
- E-commerce Integrity: If you run a store, do a full test transaction. I mean the whole thing—add a product to the cart, go through the entire checkout process, and make sure you land on the confirmation page.
- Cross-Browser and Device Testing: Fire up your staging site on Chrome, Firefox, and Safari. Shrink the window down to a mobile size. Does everything still look and work as expected?
- Plugin and Theme Integrity: Quickly check that all your plugins are still active and that your theme's styling hasn't gone haywire on key pages like the homepage or blog.
This structured process is a key part of professional development. For those who want to go even deeper, looking into guides on strategic test environment management can help you build even more sophisticated and reliable workflows.
Essential Staging Site Hygiene
A staging site that's not properly locked down can be a huge security hole. There are two things you absolutely must do to keep it secure.
First, password-protect your staging URL. This is non-negotiable. Only you, your team, or your client should ever see it. Second, double-check that your staging site is set to 'noindex'. You do not want search engines finding and indexing a duplicate version of your website; that's a fast track to SEO problems.
A staging site is a development tool, not a public preview. Treat its security and visibility with the same seriousness you apply to your live site’s backend. This practice is a core part of any solid WordPress website maintenance plan.
Common Questions About WordPress Staging
Diving into the world of a WordPress staging site can bring up a few common questions. It’s smart to get these sorted out from the start, so you can use your testing environment with confidence and sidestep some common tripwires. A lot of users, for good reason, worry about how it all impacts their live site.
Let’s tackle one of the biggest concerns head-on: SEO.
Will a Staging Site Hurt My SEO?
When it’s set up correctly, a staging site will have zero impact on your SEO. The whole trick is making sure it stays invisible to search engines like Google.
Most one-click staging features from hosts and dedicated plugins handle this for you automatically. They'll either add a noindex tag to the site's header or slap a username and password on the entire environment. This is basically a "nothing to see here" sign for search engine crawlers.
But, if you're building a staging site manually, this part is on you. You have to add the noindex tag yourself. For extra safety, you should also update your robots.txt file to block crawlers from the staging subdomain entirely. If you skip this, you can run into duplicate content problems, which can definitely put a dent in your rankings.
How Often Should I Sync My Staging and Live Sites?
Your live site is always changing. You’re publishing new posts, customers are buying products, and visitors are leaving comments. To keep things from getting messy, you should always sync your live site to your staging environment right before you start working on any new changes.
This makes sure you're testing on the most recent version of your site. If you work on an old copy and then push your updates, you could easily overwrite new orders or fresh content. That’s a nightmare you want to avoid.
Can I Test E-commerce Payments?
Yes, you can, and you absolutely should. A staging site is the perfect sandbox for running through your entire checkout process without messing with real customers or actual money.
To do this, you just need to switch on your payment gateway’s “sandbox” or “test mode.” This feature lets you run fake transactions using test credit card details that the payment processor provides. It's the only surefire way to know your checkout flow, payment processing, and confirmation emails are all working perfectly before you go live with any changes.
Staging isn't just for tweaking designs; it’s a vital tool for making sure your site's core business functions—especially for e-commerce—are solid.
Staging Site vs Local Development Environment
They might sound similar, but a staging site and a local development environment have different jobs.
- A local development environment is set up entirely on your own computer, using a tool like LocalWP. It's perfect for the early stages of coding and development because it's fast, works offline, and doesn't need a server.
- A staging site is a private, online copy of your live site that lives on a server. It’s the final proving ground before you deploy anything, great for catching server-specific glitches, running performance tests, and getting feedback from clients.
You can think of it like this: local is where you build things, and staging is where you do the final checks.
Ready to take control of all your WordPress sites from a single, powerful dashboard? WP Foundry centralizes plugin updates, theme management, user administration, and security scanning, saving you countless hours. Stop juggling logins and start managing your sites efficiently. Discover how WP Foundry can transform your workflow today.