
Understanding Your WordPress Backup Options
Restoring your WordPress site from a backup can seem intimidating. However, the process becomes much clearer once you understand the types of backups available. Essentially, there are three main categories: complete site backups, database-only backups, and file-based backups. Each type serves a different purpose and requires a specific restoration method.
A complete site backup, as the name implies, includes everything: your WordPress core files, themes, plugins, uploaded media, and the database. This provides comprehensive protection and simplifies the restoration process.
Database-only backups, conversely, focus exclusively on your website's database. This includes your posts, pages, comments, and site settings. These backups are smaller and faster to create. However, you'll need a separate backup of your files to restore your entire site.
Finally, file-based backups include only your WordPress files, excluding the database. These are useful for restoring specific themes, plugins, or media files. Keep in mind, you'll need a database backup to fully restore your website's content. The best backup type for you depends on your specific needs and risk tolerance.
Identifying Your Backup and Hosting Environment
Knowing which type of backup you have is essential for a successful restoration. Look for common backup formats like .zip files for complete site backups, .sql dumps for database backups, and compressed archives for file-based backups.
Next, consider your hosting environment. Different hosts offer varying tools and access levels for restoration. Some provide one-click restore options within their control panels, while others require using FTP or phpMyAdmin.
You'll also need your login credentials, including your database username and password, FTP details, and hosting control panel login. For a deeper dive into WordPress backups, check out this guide: How to master WordPress site backups.
Choosing the Right Restoration Approach
Now you have another important decision: manual restoration or using plugin-based solutions. Manual restoration involves directly working with your server via FTP or control panel tools. This method gives you more control but demands greater technical expertise.
Plugin-based solutions, on the other hand, streamline the restoration process by automating many steps. Many reliable plugins are specifically designed for restoring WordPress sites.
Speaking of website security, robust backups are crucial. The importance of backups is underscored by the fact that only 6% of medium-sized companies recover from catastrophic data loss, while 51% close within two years. Learn more about these statistics. This highlights how vital backups are for website resilience.
With your backup identified and your hosting environment understood, you're ready to begin the restoration process. You might also find this helpful: How to master complete WordPress site backups.
Restoring With Popular WordPress Backup Plugins
Restoring your WordPress site from a backup is often simplest with a plugin. These tools streamline the process, especially for those less familiar with manual methods. This section will guide you through restoring your site using popular backup plugins.
Restoring With UpdraftPlus
UpdraftPlus is a widely used plugin, known for its user-friendly interface. First, make sure UpdraftPlus is installed and activated on your WordPress site. In your WordPress dashboard, navigate to Settings -> UpdraftPlus Backups.
Next, select the Backup/Restore tab. You’ll find the Existing Backups section which displays your available backups. Choose the backup you need and click Restore. Select the components you want to restore, such as plugins, themes, uploads, and others.
After clicking Next, UpdraftPlus will begin the restoration process. Once finished, you’ll see a confirmation message and an activity log.
Restoring With Duplicator
Duplicator is another powerful option, especially helpful for site migrations. After downloading your Duplicator backup archive, install and activate the Duplicator plugin. (The premium version offers additional restore features.)
Go to Duplicator Pro -> Import Backups and upload your archive. Review the details, proceed, and select a recovery point. Launch the installer, deploy the package, and choose the "Restore single site" option.
Validate the process, agree to the terms, and click Next. The installer will extract your backup. Finally, simply click Admin Login to complete the restoration.
Choosing the Right Plugin and Backup Method
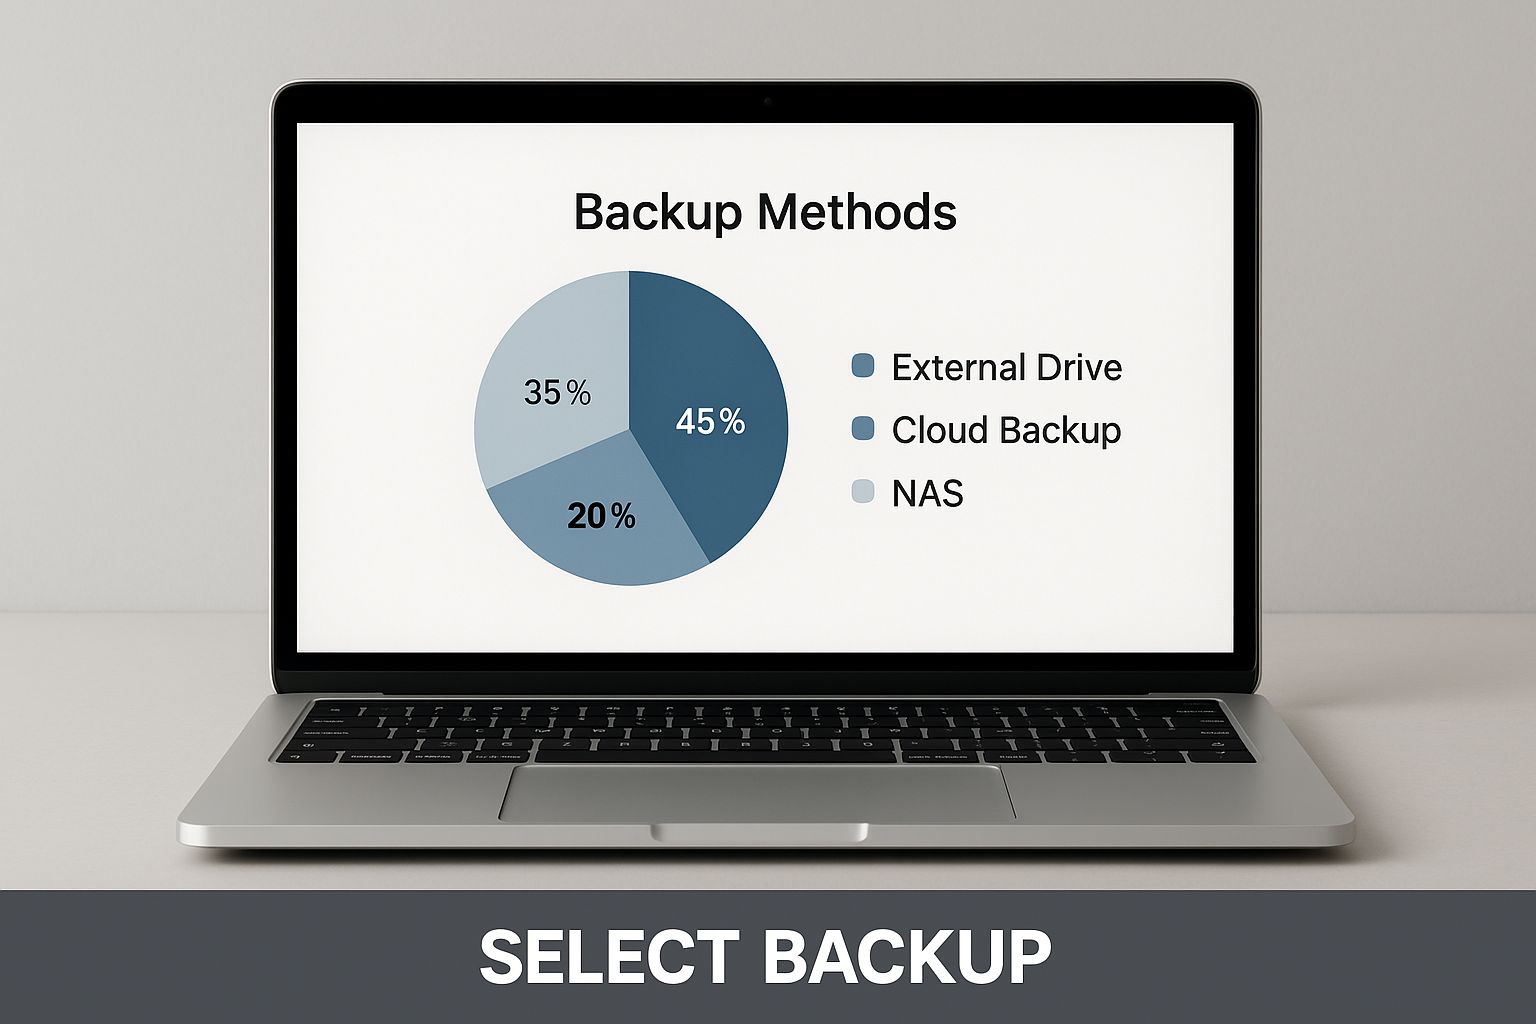
This image provides a visual overview of the WordPress backup process, highlighting the importance of choosing the right backup method. The "Select Backup" step emphasizes how critical selecting the appropriate backup strategy is for a successful restoration.
Finding the right plugin and backup method is essential for a smooth restore. For instance, UpdraftPlus excels at incremental backups and integrating with cloud storage, while Duplicator simplifies migrating a site. Top WordPress backup solutions in 2025 include plugins like UpdraftPlus, Duplicator, and Jetpack Backup. These solutions frequently offer automated backups, offsite storage, and simplified restoration processes. Speedy recovery times are crucial in disaster recovery scenarios, minimizing potential financial losses and maintaining customer trust. Find more detailed statistics here.
To help you choose the best plugin for your specific needs, let's take a closer look at the features of some popular options:
WordPress Backup Plugin Restoration Comparison: A detailed comparison of restoration features, ease of use, and recovery time for popular WordPress backup plugins
| Plugin Name | Restoration Method | Average Recovery Time | Skill Level Required | Special Features |
|---|---|---|---|---|
| UpdraftPlus | Through WordPress Dashboard | 10-30 minutes (depending on backup size) | Beginner | Incremental backups, cloud storage integration |
| Duplicator | Standalone installer | 15-45 minutes (depending on backup size and server) | Intermediate | Site migration friendly, database search and replace |
| Jetpack Backup | Automated restoration | 5-15 minutes (typically very fast) | Beginner | Real-time backups, activity log, one-click restore |
The table above highlights some key differences in restoration methods, recovery times, and required skill levels for each plugin. Choosing the right plugin depends on your specific needs and technical expertise.
Managing Large Backups and Hosting Limitations
Larger websites may face challenges with backup size and hosting limitations. Some plugins offer features to split large backups into smaller, more manageable parts. Optimizing your plugin settings and using cloud storage can improve the backup and restore process, especially for large sites or those with limited server resources. These advanced methods ensure smoother and more efficient WordPress restorations, minimizing downtime. You might also find our guide on 5 WordPress backup plugins helpful: Read also: Backup Bliss: 5 WordPress Backup Plugins To Give You Peace of Mind.
Manual WordPress Restoration When Plugins Fail
Sometimes, restoring your WordPress site requires a more hands-on approach. When plugin-based restorations aren't feasible, understanding the manual process becomes essential. This section provides a comprehensive guide to manual WordPress restoration—your reliable backup when plugins fall short.
Downloading and Preparing Your Backup Files
Before beginning the restoration process, download your essential backup files. Locate your backup archive, commonly a .zip, .tar, or .gz file, and your database backup, typically a .sql file. Extract the contents of the backup archive to an easily accessible location on your computer. This initial preparation is crucial for a successful manual restoration.
Uploading Files via FTP and Importing Your Database
Next, connect to your web server using an FTP client, such as FileZilla. Upload the extracted files to the correct directory on your server. This is usually the public_html folder or the root directory of your WordPress installation. This process is akin to moving all the components of your website to their designated place on your server.
After uploading the website files, you'll need to import your database backup. Access phpMyAdmin through your hosting control panel. Select your WordPress database and navigate to the "Import" tab. Choose your .sql file and click "Go" to begin the import process. This step effectively populates your restored website with the necessary data.
Reconnecting Files and Database: A Critical Step
Now comes a vital step: reconnecting your website files and the database. Open the wp-config.php file, located in your website's root directory, either via FTP or a file manager within your hosting control panel. Verify that the DB_NAME, DB_USER, DB_PASSWORD, and DB_HOST values correspond to your current database credentials. This step is essential for ensuring the seamless integration of your restored files and database.
Troubleshooting Common Roadblocks
Manual restorations can sometimes present challenges. File permission issues are often resolved by setting permissions to 644 for files and 755 for directories. Database connection errors, usually stemming from incorrect wp-config.php settings, require careful review of your database credentials.
Additionally, URL mismatches in the WordPress database can result in an inaccessible website. If you've changed domains, use phpMyAdmin to update the siteurl and home options within the wp_options table. Understanding these common roadblocks and their solutions is key to a smoother restoration experience.
Safety First: Protecting Your Data During Restoration
Protecting your data is paramount during a manual restoration. Before starting, create a full backup of your current site, even if restoring from a previous backup. This acts as a safety net should any issues arise. Working in a staging environment, if possible, allows you to test the restoration without affecting your live site, minimizing potential downtime.
By following these steps, you'll be well-equipped to handle WordPress restorations confidently, regardless of plugin availability. These techniques empower you to take control of your site’s recovery, ensuring its accessibility under various circumstances. Regular backups are always essential, and platforms like WP Foundry simplify this process, making restorations less stressful and securing your data.
Cloud-Based Backup Restoration Made Simple
Cloud-based backups are a significant step forward for WordPress restoration. They offer reliability and convenience that traditional methods can't match. Unlike local backups, cloud backups live on secure, remote servers. This protects your data from hardware failures, server crashes, and even natural disasters. This offsite storage significantly improves site security.
Cloud backups also offer automated recovery systems, making restoration even simpler. Many providers, like UpdraftPlus Premium and BlogVault, offer one-click restores. This eliminates manual file uploads and database imports. Automating this process drastically reduces the time and technical expertise needed to restore your WordPress site.
Restoring From Major Cloud Backup Providers
While the specifics might differ, cloud-based restoration generally involves a few key steps. First, log into your cloud backup provider's account and select the backup you need. Most providers offer several backup points, letting you choose the most relevant version of your site.
Next, start the restoration process. Depending on the provider and your hosting setup, the restoration might happen directly on your server or through a downloadable backup file. Some services let you restore directly to your server, while others provide a downloadable backup for you to install.
If you'd rather avoid manual restoration, a robust Site Management solution might be a good option. This can streamline the process and save you valuable time. No matter which method you choose, cloud-based restoration is generally faster and more efficient than traditional methods.
Advanced Cloud Restoration Features
Cloud-based backups often include advanced features that improve the restoration process even more. Point-in-time recovery lets you revert your site to specific moments. This is invaluable for undoing accidental changes or recovering from specific incidents. The trend in WordPress backup solutions has shifted towards cloud-based services for their increased flexibility and reliability. Services like VaultPress and BlogVault offer automated backup and restore options. This ensures WordPress sites can be quickly restored from backups if any problems arise. Explore this topic further.
Incremental restoration speeds up recovery by transferring only changed files, minimizing downtime for your visitors. Cross-server migration lets you restore your site to a completely different hosting environment. This offers greater flexibility and scalability.
Managing Bandwidth, Large Files, and Downtime
Cloud-based restoration introduces some practical considerations. Managing restoration bandwidth is important, especially for large sites, to prevent server slowdowns. Some providers offer features to control bandwidth usage during restoration. Handling large file transfers efficiently is also essential. Many cloud backup solutions use compression and optimization techniques to minimize transfer times.
Finally, coordinating restoration timing is crucial to minimize disruption for your visitors. Scheduling restorations during off-peak hours can lessen the impact on your site's availability. Careful planning and understanding your provider's features will ensure a smooth and efficient restoration. Using features like cloud redundancy, managing multiple backup locations, and optimizing restoration performance for your specific setup will contribute to a strong and reliable recovery strategy.
Solving Common WordPress Restoration Problems
Restoring your WordPress site from a backup should be straightforward. However, sometimes things don't go as planned. This section covers common WordPress restoration problems and offers solutions to get your site back up and running quickly.
Database Connection Errors: Reconnecting Your Site
One common issue is the "Error Establishing a Database Connection." This usually happens when the connection details in your wp-config.php file are incorrect. Carefully check that the DB_NAME, DB_USER, DB_PASSWORD, and DB_HOST values match your current database credentials. Even a small typo can cause problems. If you're still having trouble, contact your hosting provider to check for server-side database issues.
File Permission Errors: Ensuring Proper Functionality
File permission errors can also stop your restored site from working correctly. After uploading your files via FTP, make sure the correct permissions are set. Files should generally be set to 644, and directories to 755. These permissions control access, and incorrect settings can prevent essential processes from running, resulting in broken features or a blank white screen. Use an FTP client like FileZilla to adjust these permissions.
Plugin and Theme Conflicts: Restoring Compatibility
Plugin and theme conflicts can occur after a restoration, especially if your backup is old. This can lead to broken features or a distorted site appearance. A good first step is to deactivate all plugins and switch to a default WordPress theme like Twenty Twenty-Three. This creates a clean environment for troubleshooting. Reactivate plugins one at a time, testing after each activation to pinpoint the source of any conflicts. Then, switch back to your original theme and check for design issues.
URL Mismatch Problems: Making Your Site Accessible
If your site URL has changed since you created the backup, you might run into URL mismatch problems, making your site inaccessible. These mismatches can confuse WordPress. Update the siteurl and home options in the wp_options table within your database, usually accessed through phpMyAdmin, to reflect your current URL. This ensures WordPress can find your site's files.
Partially Completed Restorations: Recovering Data
Sometimes a restoration gets interrupted, resulting in a partially restored site. Assess the situation and decide whether it's best to resume the process or start over. If resuming, identify which components were successfully restored and focus on the rest. Make a fresh backup of your current, partially restored site before continuing.
To help understand and resolve these issues more effectively, the table below outlines common WordPress restoration errors, their causes, and quick solutions:
WordPress Restoration Error Solutions
Common restoration errors, their causes, and step-by-step solutions to resolve them quickly.
| Error Type | Common Cause | Quick Solution | Prevention Method |
|---|---|---|---|
| Error Establishing a Database Connection | Incorrect database credentials in wp-config.php |
Verify and correct the DB_NAME, DB_USER, DB_PASSWORD, and DB_HOST values. |
Double-check credentials before restoration. |
| File Permission Errors | Incorrect file and directory permissions after FTP upload | Set file permissions to 644 and directory permissions to 755 using an FTP client. | Ensure correct permissions are set during the upload process. |
| Plugin and Theme Conflicts | Incompatibility between restored plugins/themes and current WordPress version. | Deactivate all plugins, switch to a default theme, then reactivate plugins one by one, testing after each. | Regularly update plugins and themes. |
| URL Mismatch | Site URL changed since backup creation. | Update siteurl and home options in the wp_options table in the database using phpMyAdmin. |
Update backups after any site URL changes. |
| Partially Completed Restoration | Interrupted restoration process. | Assess the damage, create a new backup, and either resume or restart the restoration process. | Ensure a stable internet connection during restoration. |
This table provides a quick reference for troubleshooting common restoration problems. Regular backups and keeping your WordPress installation, plugins, and themes up to date are the best ways to prevent these issues.
You might be interested in: How to Keep Your WordPress Site Secure Without a Developer. Regular backups are a cornerstone of security. WP Foundry helps streamline backups, offering extra peace of mind. Implementing these strategies will help avoid common WordPress restoration pitfalls.
Verifying Your Restoration Success
Restoring your WordPress site from a backup is essential. However, it's not truly finished until you've double-checked that everything is working as expected. Think of it like a pre-flight checklist – you wouldn't take off without making sure everything is in order! This section covers the steps you need to take to ensure your WordPress site is fully operational after a restoration.
Front-End and Back-End Checks: Ensuring Everything Works
Start by thoroughly examining your site's front-end. Browse different pages, making sure all content displays correctly. Test interactive elements like contact forms and search bars. This confirms your visitors experience the site as intended. After a restore, it's also a good idea to check if your website is converting visitors effectively. You can learn more about creating a strong Conversion Optimization Strategy.
Next, verify your admin panel access. Log in and explore the dashboard. Make sure you can manage your site's content, settings, and users without any issues. This confirms you retain full control after the restoration process.
Plugin and Theme Functionality: Catching Compatibility Issues
Plugins and themes are vital parts of a WordPress site. After restoring, carefully test each one. Make sure they function correctly and don't clash with each other or your WordPress version. Be on the lookout for broken features, design inconsistencies, or any error messages. This proactive approach can prevent headaches later on.
Database Integrity: Validating Your Data
Your WordPress database is the heart of your site's information. Validating its integrity after a restoration is critical. Check for missing content, corrupted data, or database connection problems. Tools like phpMyAdmin allow you to directly inspect database tables, ensuring all essential data is present and correct.
Post-Restoration Tasks: Essential Steps for a Smooth Transition
Several essential post-restoration steps are often missed. Updating URLs is vital, especially if your domain or site address changed during the restore. Reconfiguring settings that might have been reset is equally important. Also, address any compatibility issues between your restored content and your current WordPress version, plugins, or themes. These tasks help ensure a smooth transition and prevent future problems.
Performance, Security, and Backup Verification
Once functionality is verified, optimize your restored site's performance. Clearing caches and optimizing images can significantly improve loading speed. Strengthen security by updating passwords and installing security plugins. Finally, verify your backup process itself. Confirm that your backup is complete, undamaged, and restorable. This provides peace of mind knowing you have a reliable safety net.
Documentation and Ongoing Monitoring: Professional Best Practices
Documenting your restoration process and creating post-restoration checklists provides a valuable resource for future reference. This can streamline any subsequent restorations. Setting up ongoing monitoring can alert you to potential issues, allowing you to address problems proactively.
By following these verification steps, you can confidently consider your WordPress restoration a complete success. A fully functional, secure, and optimized website is well worth the effort.
Want a simpler way to handle WordPress backups and restorations? Consider WP Foundry, a cross-platform desktop application that simplifies WordPress site administration, including backups and restores, from a single interface. It's a comprehensive solution for efficient WordPress management.
Article created using Outrank
Comments
7 responses to “WordPress Restore From Backup: Your Complete Recovery Guide”
[…] working version of your site in minutes, keeping downtime to a minimum. We have a helpful guide on WordPress restore from backup if you want a step-by-step walkthrough. Think of this as your emergency escape hatch – use it […]
[…] This can take a few minutes if you have a large site. You'll get a success message when it's finished, and your database will be back to how it was when you made that backup. While this manual approach is effective, it also helps you better understand automated tools. You can see how this process compares to a more streamlined one and learn how to restore a WordPress site from a backup using WP Foundry. […]
[…] you're ready to tackle this yourself, our complete guide on how to perform a WordPress restore from backup walks you through every single step. For more on setting the right backup schedules, Hostinger also […]
[…] a solid backup and recovery plan is non-negotiable. It's always a good idea to know how to restore your WordPress site from a backup just in case something goes […]
[…] somewhere is only half the solution. The real test comes when you're under pressure and need to restore WordPress from backup without a hitch. This is why having a solid, tested restoration plan is one of the most critical […]
[…] process is critical. To see a practical application, you can dive into the specifics of how to restore a WordPress site from a backup. This knowledge turns a theoretical safety net into an actionable recovery […]
[…] your backup is good but also gets you familiar with the restore process itself. Our guide on how to restore WordPress from a backup can walk you through […]