
We've all been there—staring at a blank screen, waiting for a website to load. It's frustrating, and it's a feeling your visitors know all too well.
The fix? Caching. It’s all about creating temporary snapshots of your website's content at three key layers: in the user's browser, on your server, and through a Content Delivery Network (CDN). Getting this right prevents your website from being rebuilt from scratch for every single visitor, which is a massive win for your load times.
Why Caching Is a Game-Changer for Site Speed

Honestly, website caching is probably the single most effective way to fix a slow site. Instead of forcing your server to process every request from the ground up, caching serves a pre-built, ready-to-go version. For the user, everything just feels instant.
But this is more than just a technical tweak. A faster site delivers a much better user experience, which often translates to better SEO rankings and less strain on your server. When you learn how to cache a website, you’re making a direct investment in those results. For a deeper dive, check out our comprehensive guide on the topic: https://wpfoundry.app/how-to-cache-a-website/
The Three Layers of Caching
To really get a handle on performance, you need to understand the different caching methods and how they play together. Each one tackles a specific bottleneck in the content delivery chain.
This quick table breaks down the three core caching methods. Use it to see where each type of caching happens and what its main job is.
A Quick Look at the Three Caching Layers
| Caching Method | Where It Works | Main Advantage |
|---|---|---|
| Browser Caching | On the visitor's own device | Speeds up return visits by storing files locally |
| Server Caching | On your website's host server | Reduces server workload and processing time |
| CDN Caching | On a global network of servers | Slashes load times for a worldwide audience |
Let's break these down a bit further.
- Browser Caching: This happens right on your visitor's computer or phone. It stores static files—think logos, CSS stylesheets, and JavaScript files—so they don't have to be downloaded again on repeat visits. It's all about making your site faster for returning users.
- Server Caching: This one is focused on reducing the heavy lifting your hosting server has to do. It saves the results of complex tasks, like database queries, so the server doesn't have to repeat the same work over and over.
- CDN Caching: A Content Delivery Network is a game-changer for reaching a global audience. It stores copies of your site in data centers around the world and delivers content from the server that's geographically closest to the visitor. This dramatically cuts down on latency.
The growing importance of this tech is clear when you look at the numbers. The transparent caching market, once valued at $4.17 billion, is projected to rocket past $5 billion very soon. This boom is driven by the explosion in internet usage and mobile data traffic, which just goes to show how critical efficient content delivery has become.
Caching is a huge piece of the puzzle, but it's not the only one. For e-commerce sites, for instance, exploring additional strategies can make a world of difference. These detailed and effective Shopify speed optimization tips are a great place to start looking for more ideas.
Putting Browser Caching to Work with HTTP Headers
Let's start with what I consider the quickest win when you're figuring out how to cache websites: making the most of your visitors' own browsers. Browser caching is simply a way to tell a user's web browser to keep a local copy of certain files from your site. We're talking about the static stuff—assets that don't change often, like your logo, CSS files, and JavaScript.
The payoff is huge. When a user returns to your site, their browser can load these files directly from their device instead of having to download them all over again from your server. In my experience, getting this one thing right can slash load times for repeat visitors by over 50%. That's a massive improvement for user experience and retention.
The diagram below shows this in action—the browser checks its local cache first, and only requests a file from the server if it doesn't have a fresh copy.
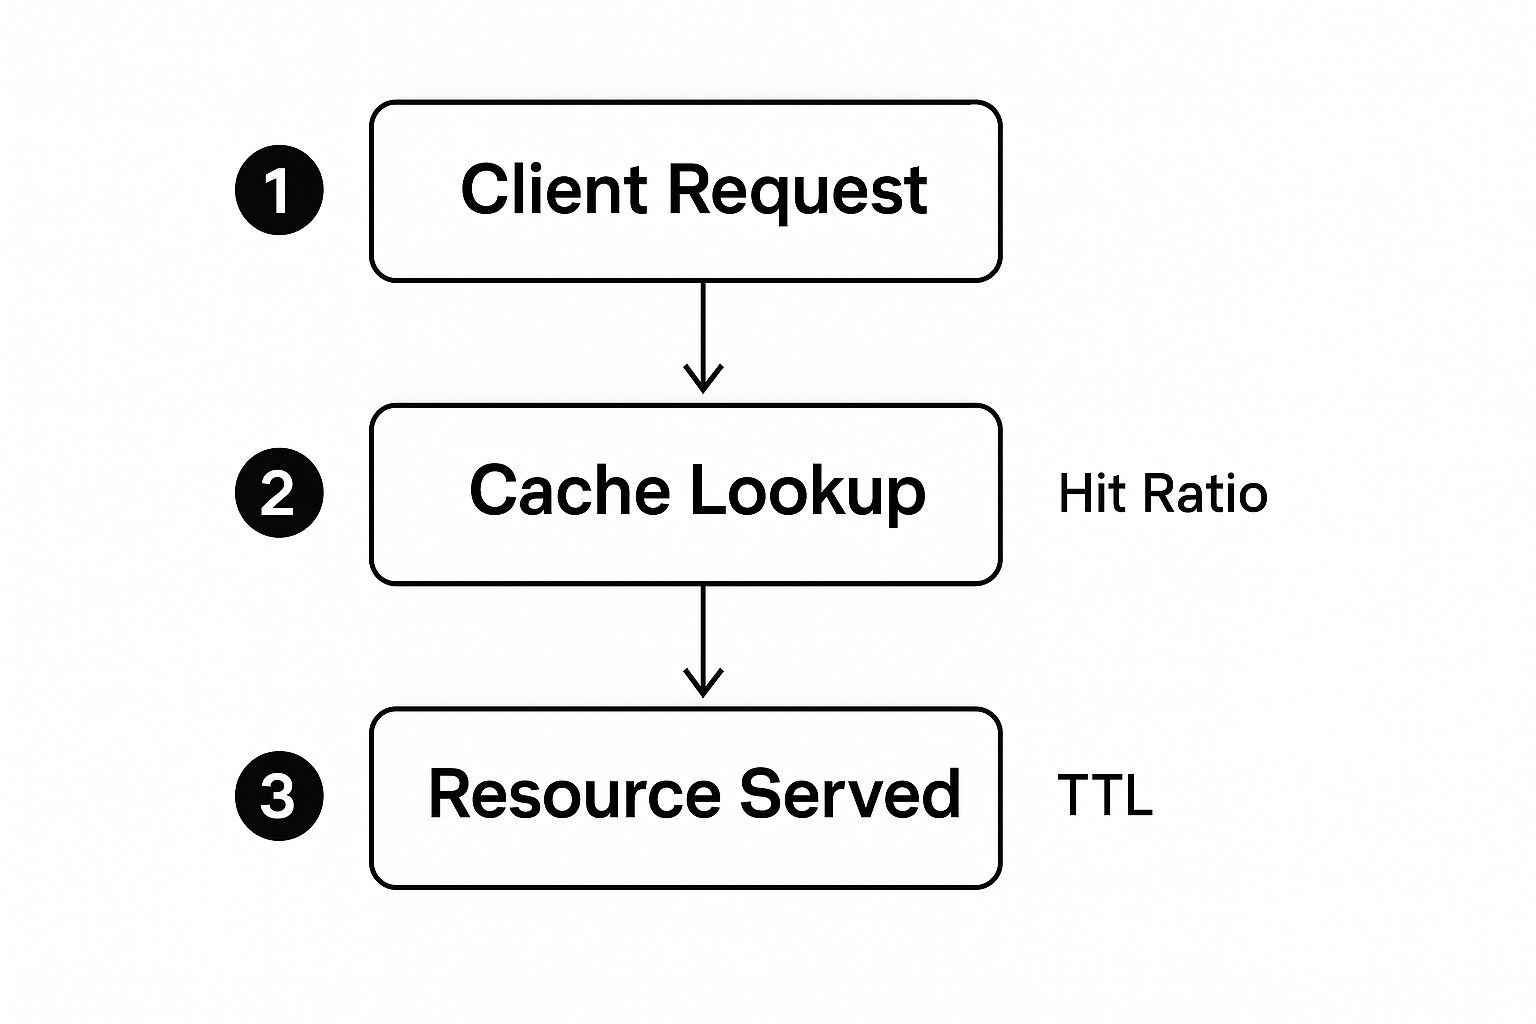
The goal here is a high "hit ratio," which just means the browser finds what it needs in the local cache more often than not. More hits directly translate to faster page loads for anyone who has visited your site before.
Using Cache-Control and Expires Headers
So, how do you make this happen? You need to configure HTTP headers on your web server. Think of these as little instructions that travel with your files, telling browsers how to handle them. The two most important headers for browser caching are Cache-Control and Expires.
- Cache-Control: This is the modern, more flexible header. It uses "directives" like
max-ageto tell the browser how many seconds a file can be considered "fresh" and served from the local cache. - Expires: This is the older way of doing things, setting a specific date and time for a file to expire. It still works, but if both headers are present,
Cache-Controlalways wins.
Let’s take a real-world example: your company logo. That file probably never changes. You can confidently tell browsers to cache it for a very long time, like a year.
Pro Tip: I recommend setting long cache times (e.g., one year) for truly static assets like images, CSS, and JS files. For anything that might be updated more frequently, use a shorter duration—maybe a week or just a few hours. Finding the right balance is key to keeping your site fast without accidentally serving stale content.
Practical Implementation on Your Server
Setting up these headers is done right in your server's configuration file. The exact code looks a bit different depending on whether you’re on an Apache or Nginx server, but the principle is the same.
For Apache Servers (.htaccess file)
If your website runs on an Apache server, you'll need to add some rules to your .htaccess file. This file is usually in the root directory of your site. Here’s a solid example you can copy and adapt.
ExpiresActive On
Cache images, icons, video, and audio for one year
ExpiresByType image/jpeg "access plus 1 year"
ExpiresByType image/gif "access plus 1 year"
ExpiresByType image/png "access plus 1 year"
ExpiresByType image/webp "access plus 1 year"
ExpiresByType image/svg+xml "access plus 1 year"
ExpiresByType image/x-icon "access plus 1 year"
Cache CSS and JavaScript for one month
ExpiresByType text/css "access plus 1 month"
ExpiresByType application/javascript "access plus 1 month"
This snippet tells browsers to hang onto different image files for a whole year, while CSS and JavaScript files get cached for one month.
For Nginx Servers (nginx.conf file)
If you're using Nginx, the logic is identical, but the syntax is different. You’ll want to add a location block like this to your server's main configuration file.
location ~* .(js|css|png|jpg|jpeg|gif|ico|svg|webp)$ {
expires 1y;
add_header Cache-Control "public, no-transform";
}
This single block is really efficient. It catches all common static file types and sets a one-year expiration, telling browsers to cache them aggressively. Adding these simple code snippets is a fundamental first step if you want to learn how to cache websites properly.
Unlocking Performance with Server-Side Caching

While browser caching is fantastic for repeat visitors, it doesn't help first-time users at all. This is where server-side caching comes in, speeding things up for everyone by storing prepared content directly on your server before a visitor even shows up.
Imagine your server is a chef. Without caching, the chef makes every single meal from scratch, every time. With server-side caching, the chef prepares popular dishes ahead of time so they can be served instantly. This not only makes for a better user experience but also dramatically cuts down on your server's workload. For a deeper dive into the specific methods, our guide on the types of caching is a great starting point.
The importance of this technology is clear when you look at the market. Valued at $8.95 billion, the global data caching market is expected to reach $21.5 billion by 2032. This explosive growth is driven by industries like e-commerce and gaming, where instant data access is absolutely critical. You can read more about the data caching market's growth on Verified Market Reports.
Object Caching for Dynamic Websites
If you’re running a website with heavy database usage—think e-commerce stores, membership sites, or active forums—object caching is non-negotiable. Every page load on these sites triggers multiple database queries to pull product info, user profiles, or posts. This can really hammer your server.
Object caching tools like Redis and Memcached essentially give your server a short-term memory. They store the results of common database queries directly in your server's RAM.
- Redis: In my experience, Redis is a powerhouse for WooCommerce sites. It handles complex data types and can store them persistently, which is perfect for managing things like shopping carts, user sessions, and related product data.
- Memcached: This one is simpler and often faster for basic data. It's an excellent choice if you just need to cache simple data strings and don't require the data to persist.
By putting an object cache in place, you can significantly reduce the load on your database, which is often the biggest performance bottleneck for dynamic websites.
Full-Page Caching for Content-Heavy Sites
For content-heavy sites like blogs or news portals where most visitors see the same page, full-page caching is your best bet. This method goes a step further than object caching by storing the entire, fully-rendered HTML of a page.
When a visitor lands on a page, the server can deliver the pre-built HTML file immediately. This completely bypasses all the slow PHP processing and database lookups. It's one of the single most effective ways to slash your Time to First Byte (TTFB).
Popular tools for this are Varnish Cache or the FastCGI Cache module built into Nginx.
I once worked with a news site that saw incredible results with Varnish. It acts as a middleman in front of the web server, catching incoming requests and serving cached pages at blazing speeds. This allowed their server to handle massive traffic spikes during breaking news events without even flinching.
Ultimately, the choice between object and full-page caching comes down to what your site does and how its content is served.
Implementing Caching with Plugins and CDNs

If the thought of digging into server configuration files makes you a bit nervous, I have good news. Some of the most effective caching tools come in the form of easy-to-use plugins and services that handle all the complex bits for you. This is almost always the quickest way to see a major jump in your site's performance.
From my own experience, the one-two punch of a good caching plugin and a Content Delivery Network (CDN) delivers the best results for the least amount of effort. They work in tandem: the plugin optimizes how your site is served from its origin, while the CDN closes the physical gap between your content and your visitors.
Leveraging Caching Plugins for Easy Wins
If you're using a CMS like WordPress, caching plugins are non-negotiable. They take complicated tasks like page caching, browser caching rules, and database cleanups and present them as a clean interface with simple toggles and settings.
So, instead of manually writing Cache-Control headers, a plugin like WP Rocket or W3 Total Cache applies the correct rules with just a few clicks. These tools are built to understand that things like images can be cached for a long time, while other assets need to be updated more frequently.
When you're setting up a caching plugin, you'll usually find options to:
- Enable Page Caching: This creates static HTML files of your pages. It’s a game-changer because the server can just send the finished file instead of building it from scratch with PHP and database queries for every single visitor.
- Minify CSS and JavaScript: These settings automatically strip out unnecessary spaces and comments from your code files, making them smaller and quicker for browsers to download.
- Optimize Your Database: A lot of plugins include tools to clear out old post revisions, trashed comments, and other digital clutter that can bog down your database over time.
For anyone running a WordPress site, especially with WP Foundry, a well-configured caching plugin isn't just a nice-to-have. It’s a core piece of your toolkit for keeping the site fast and healthy without needing to be a server admin.
Supercharging Your Site with a CDN
A Content Delivery Network (CDN) expands your caching strategy to a global scale. In simple terms, a CDN is a worldwide network of servers that stores copies (a cache) of your website's static files—think images, CSS, and JavaScript.
When a user visits your website, the CDN delivers those files from the server location closest to them. This means a visitor from Tokyo gets your logo from a server in Japan, not your primary server in New York. The result is a dramatic drop in latency and a much faster experience for your entire global audience.
Big names in this space include Cloudflare and AWS CloudFront. Getting started is typically very straightforward. You create an account, then update your domain's nameservers to point to the CDN. After that, the CDN automatically starts caching your content. This is the secret to how you cache websites effectively for users everywhere.
The technology driving this is part of a huge, expanding market. The transparent cache industry, which includes the systems that CDNs are built on, is projected to become a business worth nearly $5.83 billion. This boom is powered by giants like Akamai and Google pushing for quicker content delivery across the web. You can read more about the transparent caching market's expected growth if you're curious.
How to Confirm Your Caching Is Actually Working
Flipping the switch on caching feels great, but how do you know it's really doing its job? Setting up browser rules or a server-side cache is only half the battle. The other, more important half is verification—making sure your efforts are actually speeding things up for your visitors.
If you don't check, you're just hoping for the best. You'll have no idea if your Time to First Byte (TTFB) has improved or if return visitors are getting that snappy experience you're after.
Let's dig into a few practical ways to check.
Checking Cache Status in Your Browser
The quickest and most direct method is right inside your web browser. Using the built-in developer tools, you can see exactly how your site’s assets are being loaded and whether your Cache-Control headers are being respected.
Here's the simplest way to check this using Chrome's DevTools:
- First, open your website in a new incognito window.
- Right-click anywhere on the page and select Inspect to open the Developer Tools panel.
- Navigate to the Network tab.
- Now, reload the page. You should see all your site’s files load with a 200 status code. This means they were fetched fresh from the server, which is what we expect for a first-time visit.
- Don't close the Network tab. Just hit reload one more time.
On this second page load, look closely at the "Size" column. You should see many of your assets—images, CSS, JavaScript—now showing a status of 200 (from memory cache) or 200 (from disk cache). That's your proof right there. It confirms the browser grabbed the files from its local storage instead of re-downloading them.
Using Performance Testing Tools
For a more comprehensive look, online performance tools are your best friend. Services like GTmetrix or WebPageTest give you incredibly detailed reports on how your site loads from different locations around the globe. This provides a much more realistic picture of what real users experience.
When you run a test, pay attention to these metrics:
- Time to First Byte (TTFB): This is all about server response time. A well-configured server or full-page cache will drop this number dramatically. It's a key indicator of a healthy back-end cache.
- Repeat View Load Time: Most testing tools run a "Repeat View" test. This simulates what happens when a visitor comes back to your site. A big drop in load time between the first and repeat view is exactly what you want to see—it's the clearest sign that your browser caching is working perfectly.
Key Takeaway: Don't just focus on the first-load time. The real magic of caching shows up in the repeat view. If that second load is significantly faster, you've nailed your caching strategy.
Sometimes, you might push an update to your site but not see the changes live because of aggressive caching. When this happens, you'll need to manually clear things out. For WordPress users, learning how to clear your WP cache is a crucial skill. It forces the server to serve the newest version of your content to everyone.
Common Questions About Website Caching
Diving into website caching can feel like opening a can of worms. It’s natural to have questions pop up about how it all works, whether it will break your site, and if you’re even using the right combination of tools.
Let’s tackle some of the most common questions I hear. Getting these answers straight is a big part of learning how to cache your website correctly and moving forward with a bit more confidence.
Will Caching Show Outdated Content?
This is probably the #1 concern people have, but modern caching is designed specifically to avoid this problem. You're in the driver's seat with a setting called Time-to-Live (TTL). This simply tells the cache how long it should hold onto a piece of content before it needs to check back with your server for a fresh copy.
And for those times when you need an instant update—like after you've published a breaking news post or updated a product's price—you have a big red button. Almost every caching plugin and CDN has a "Purge Cache" or "Clear Cache" option. Hitting that button tells every server and browser to immediately dump their stored copies and grab the absolute latest version from your host. It’s essentially a hard reset for your site's cached files.
There's another handy trick called "cache busting." This is where a file’s name is automatically changed when it’s updated (for example,
style-v1.cssbecomesstyle-v2.css). To a browser, that looks like a brand-new file, forcing it to download the fresh version and bypass the old cached one entirely.
What Is the Difference Between Browser and Server Caching?
Think of them as a tag team, each handling a different part of the job to speed up your site.
- Browser caching happens right on your visitor's own computer. It stores files that don't change often—like your logo, CSS stylesheets, and JavaScript files—locally. When they visit your site again, their browser just loads those files from its own storage instead of downloading them all over again. This is what makes a site feel blazing fast for repeat visitors.
- Server caching happens back at your web host. It takes care of the heavy lifting, like running complex database queries that build your pages. The server saves the final HTML result so it doesn't have to do all that work for every single person who visits.
They’re a powerful duo. Server caching speeds up the very first visit, and browser caching makes every visit after that even faster.
Do I Still Need a CDN If I Use a Caching Plugin?
Yes, you absolutely do. It's a common mistake to think one replaces the other, but they perform two very different, complementary roles.
A caching plugin works to optimize your site at the source—your server. It's focused on making sure your website is generated and served as efficiently as possible from its home base.
A CDN, on the other hand, takes that perfectly optimized content and distributes it across a global network of servers. So, while your caching plugin makes your site load fast for someone near your server in, say, Chicago, the CDN makes sure a visitor in Sydney or London gets that same fast experience by serving the files from a server much closer to them. For a genuinely high-performance website with a global audience, you need both.
Trying to manage all these different layers of site performance can get complicated, but it doesn't have to be. WP Foundry brings all your WordPress administration tasks together, letting you handle plugins, themes, and backups from a single desktop app. Take back control of your site’s health and security with an interface built for efficiency. Learn more about WP Foundry and simplify your workflow today.
Comments
One response to “How to Cache Websites and Instantly Boost Speed”
[…] This simple step dramatically cuts down on server load and delivers your content almost instantly. If you want to get into the nitty-gritty of how this works, check out our guide on how to cache websites. […]