
At its core, cloning a WordPress site means creating a perfect, fully functional duplicate of your website. It's my go-to strategy for testing significant updates in a sandboxed environment or for moving a site to a new host without a second of downtime.
Why Cloning a WordPress Site Is a Smart Move
The idea of cloning a WordPress site might sound intimidating, like something only a seasoned developer would tackle. But honestly, it’s a fundamental skill for anyone who's serious about managing their website properly. This isn't just about a simple backup; we're talking about creating a fully operational copy that opens up a ton of powerful new workflows.
The most common reason I see people clone their site is to set up a staging environment. Think about it: you want to try out a new plugin, update your theme, or make some major design changes. Pushing those changes directly to your live site is a huge gamble. One little conflict could crash the whole thing. A clone gives you a private playground to experiment as much as you want, with zero risk to your live traffic.
Key Scenarios for Site Cloning
Beyond just testing things out, cloning is a practical solution for a bunch of other situations. For instance, it's the secret to a stress-free server migration. Instead of wrestling with potential downtime while you manually move files, you can just clone your site to the new host, make sure everything works perfectly, and then simply point your domain over when you’re ready. Easy.
Developers rely on clones all the time to make their jobs easier. They can build out a complete site redesign for a client on a cloned version. Once the client gives the thumbs-up, pushing the new site live takes just a few minutes. It's also a fantastic way to create a "starter" template with all your favorite plugins and settings pre-configured, letting you spin up new projects in record time.
Cloning shifts your website management from a reactive, problem-fixing mode to a proactive, problem-prevention strategy. It’s your safety net for both innovation and routine maintenance.
I've put together a quick table that breaks down the most common reasons you'd want to clone your site. It's a handy reference for seeing just how versatile this technique can be.
Common Reasons to Clone Your WordPress Website
| Scenario | Primary Benefit | Ideal For |
|---|---|---|
| Testing Updates | Safely test new plugins, themes, or WordPress core updates without risking your live site. | Site owners and developers who want to avoid conflicts and downtime. |
| Site Migration | Move your entire website to a new hosting provider or server with zero interruption. | Anyone switching hosts who can't afford to have their site go offline. |
| Staging Environment | Create a private, identical copy of your site for development and design changes. | Agencies and freelancers building or redesigning client websites. |
| Creating Templates | Set up a pre-configured "base" site to quickly launch new, similar projects. | Developers who build multiple sites with a consistent set of tools and settings. |
As you can see, the applications are pretty wide-ranging, from simple safety checks to full-blown development workflows.
A Foundation for Growth and Security
When you consider that WordPress powers over 43.4% of all websites on the internet, mastering its essential functions becomes a no-brainer. With more than 541 million active sites out there, the community relies on dependable management techniques like cloning to keep things running smoothly.
Ultimately, getting comfortable with cloning your WordPress site gives you a massive amount of control and peace of mind. Whether you're troubleshooting a tricky bug, moving to a better host, or giving your site a complete makeover, having a perfect copy ready to go is one of the smartest moves you can make.
For a detailed walkthrough of the different ways to get this done, check out my complete guide on how to clone a WordPress site.
Using a Plugin for Quick and Easy Cloning
Let's be honest, the idea of manually digging through files and database tables is enough to make most people run for the hills. This is exactly why cloning plugins were invented. They take a complicated, error-prone process and turn it into a series of simple clicks.
Tools like Duplicator and All-in-One WP Migration are industry favorites for a good reason. Instead of you having to mess with FTP clients and phpMyAdmin, they do all the heavy lifting. The plugin bundles up your entire site—themes, plugins, uploads, and database—into a tidy package that you can move anywhere you want.
Even better, they generate a special installer file. This little script handles the really tricky parts, like updating your database connection details and running a search-and-replace for your old domain name. It's a lifesaver.
Choosing Your Cloning Plugin
One of the best things about WordPress is its massive plugin library. With over 59,000 free plugins available, you're spoiled for choice when it comes to cloning tools. This huge demand is partly fueled by the 4.6 million online stores running on WooCommerce, where cloning a site to a staging area for testing is just part of the daily routine.
Here are a couple of the most reliable options out there:
- Duplicator: A long-time favorite, especially among developers. It’s known for being rock-solid. Duplicator creates a "package" containing a zip archive of your site and an
installer.phpfile, which you then upload to your new server. - All-in-One WP Migration: This one is incredibly popular because of its straightforward, user-friendly interface. It exports your entire site into a single
.wpressfile. You just import that file into a fresh WordPress installation on the destination server.
For anyone new to this, using a plugin is almost always the best way to go. If you need a quick reminder on the basics, feel free to check out our guide on how to install a plugin on WordPress.
The Standard Plugin Cloning Workflow
While every plugin has its own unique interface, the actual process is pretty much the same across the board. You package the site, move the package, and then unpack it at the new location.
First, you'll install and activate your chosen plugin on the original site—the one you're copying. Once that's done, you'll find the plugin's menu in your WordPress dashboard and start the process to build a package. The plugin will scan everything—your wp-content folder, your core files, and your database—and bundle it all into one or two files for you to download.
This step can take a few minutes, especially for larger sites, so be patient. Once it's finished, download the package to your computer. You now have a perfect snapshot of your entire website.
Uploading and Running the Installer
Now it's time to move that package to its new home. This could be a different hosting account, a local setup on your computer for development, or even a staging subdirectory on your current server.
You’ll need to upload the package files (the archive and the installer script) to the root directory of the new location. You can do this with an FTP client like FileZilla or through the File Manager in your hosting control panel.
This is where the magic happens. You don't need to install a fresh copy of WordPress. Instead, you just navigate directly to the installer script in your web browser (e.g., http://yournewdomain.com/installer.php).
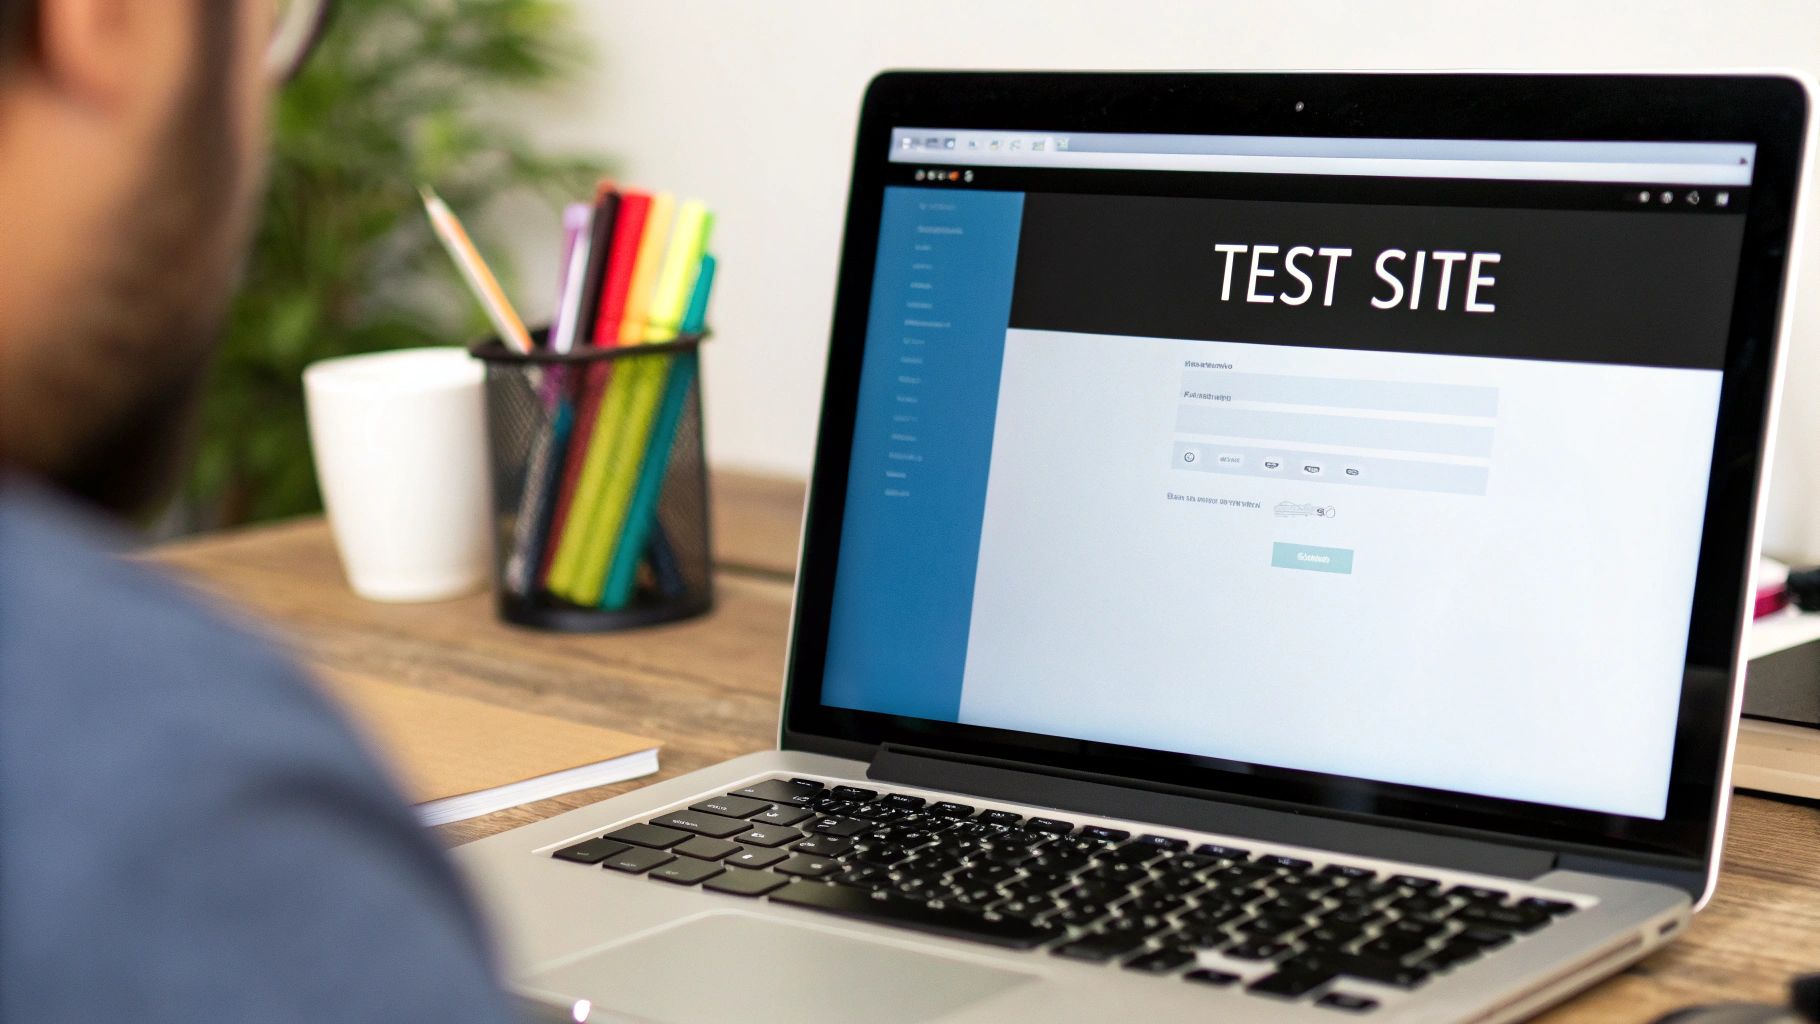
This screenshot shows the main screen for the Duplicator plugin. As you can see, it’s a clean interface where you can manage your packages, download the files, or create a new one.
The installer script will then guide you through the last few steps. It will ask for your new database details—the database name, username, and password for the destination server. Once you enter that information, it gets to work. It unpacks the archive, imports the database, and—most importantly—updates every instance of your old URL to the new one. This is crucial for preventing a mess of broken links and images.
Pro Tip: If your website is particularly large (think 500MB or more), you might run into server timeouts when the plugin tries to create the package. The premium versions of these plugins often solve this by offering direct server-to-server transfers or letting you save the package to cloud storage like Google Drive or Dropbox.
After the installer works its magic, it will prompt you to log into the admin area of your newly cloned site. The very last step is usually a "cleanup" option, where the plugin deletes the installer files to keep your new site secure.
And that's it. You now have a perfect, one-to-one copy of your original website, ready to go.
The Manual Method for Complete Control
While plugins offer a fantastic shortcut, sometimes you just need to get your hands dirty. Manually cloning a WordPress site puts you in total control and gives you a much deeper appreciation for how the core components—the files and the database—really work together.
This method is perfect for developers who need that granular control, for troubleshooting tricky issues, or for anyone who just wants to learn what's happening under the hood. It peels back the curtain, removing the "black box" of a plugin and putting you squarely in the driver's seat.
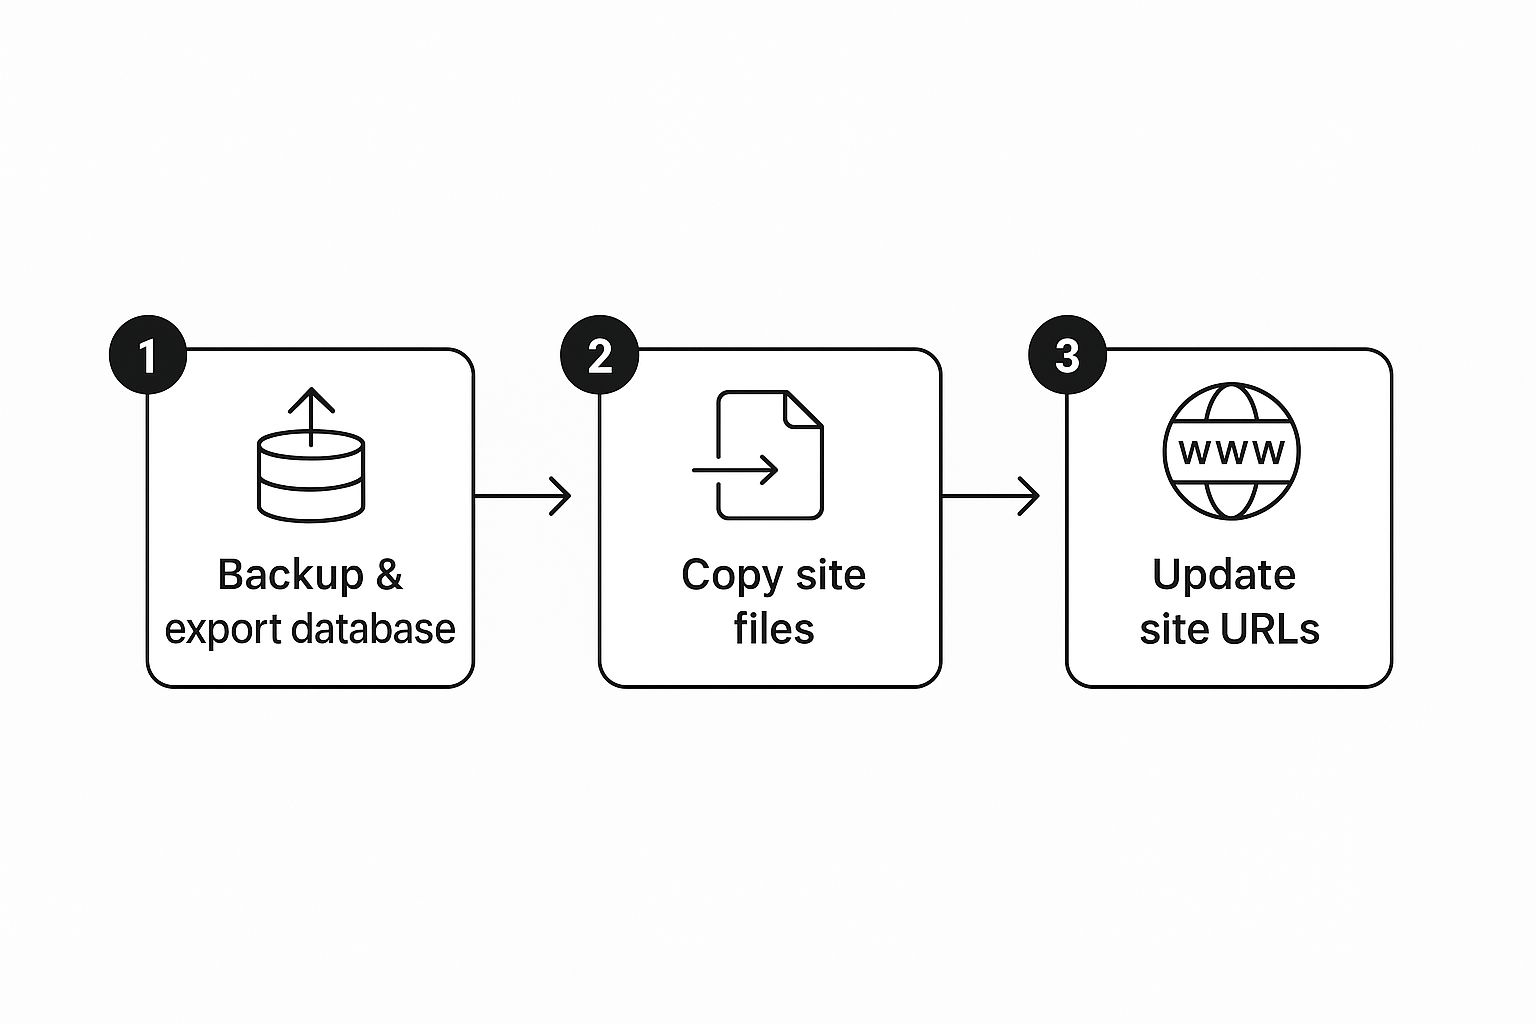
The whole process boils down to two main jobs: moving the files and moving the database. Think of it like moving house: your files are all your stuff (furniture, photos, clothes), and the database is the detailed inventory list telling you what everything is and where it belongs. You need both.
Securing Your Website Files
First things first, you need to grab all the files that make up your site. This means your theme, plugins, image uploads, and the WordPress core files themselves. The most reliable way to do this is with a File Transfer Protocol (FTP) client.
An FTP client is just a desktop app that connects your computer directly to your web server. It's like having a file explorer window for your remote server. FileZilla is a solid, free choice that works on pretty much any operating system.
To connect, you’ll need your FTP credentials from your hosting provider:
- Host: Your server's address (often just your domain name).
- Username: Your FTP account username.
- Password: The password for that account.
- Port: Usually port 21 for standard FTP or 22 for SFTP (Secure FTP), which is always the better option if available.
Once you’re connected, you'll see a familiar file structure. Your WordPress site is usually sitting in a folder called public_html or one named after your domain. Dive into that directory and download the entire contents to a new folder on your computer. This can take a while if your site is large, so now’s a good time to grab a coffee.
Exporting the WordPress Database
With your files safely on your local machine, it's time for the other half of the equation: the database. This is where all your content lives—posts, pages, user info, comments, and all your settings. Most web hosts give you access to a tool called phpMyAdmin through their control panel (like cPanel or Plesk).
phpMyAdmin is a web-based tool for managing your MySQL databases. Once you log in, select your site's database from the list on the left. If you aren't sure which one it is, you can find the name right inside your wp-config.php file, which is in the root folder you just downloaded.
Inside the database view, click the "Export" tab at the top. The "Quick" export method is fine for most cases, and make sure the format is set to SQL. This will generate a .sql file, which is basically a giant script that can recreate your entire database from scratch. Download this file and keep it with your other site files.
Crucial Tip: Before you move on, do a quick sanity check. Make sure your file download and your database export both completed without any errors. A corrupted zip or an incomplete
.sqlfile is the number one cause of headaches with manual migrations.
Bringing Your Cloned Site to Life
Okay, you now have a complete, self-contained copy of your website. The next stage is deploying it to its new home. This just means reversing the process: uploading the files and importing the database into a fresh, empty environment.
Start by connecting to your new server with your FTP client. Then, using your new host’s control panel, create a new, empty database and a new database user. Be sure to write down the new database name, username, and password—you'll need them in a minute.
Now, upload all the website files you downloaded earlier into the root directory of the new server. While that’s chugging along, you can get started on the database.
Importing and Reconfiguring the Database
Head back into phpMyAdmin on your new server and select the empty database you just created. This time, click the "Import" tab. Choose the .sql file you exported earlier and click "Go." This will run the script, perfectly recreating your original database structure and content in its new location.
With the files uploaded and the database imported, there's one final, critical step. You have to tell WordPress how to connect to its new database.
Find the wp-config.php file on the new server. Open it in a text editor and look for these lines:
define( 'DB_NAME', 'old_database_name' );
define( 'DB_USER', 'old_username' );
define( 'DB_PASSWORD', 'old_password' );
You need to replace the old values with the new database credentials you created a moment ago. Save the file and upload it back to the server, overwriting the old version.
Final URL Adjustments for a Flawless Transition
Almost there! There’s one last common tripwire. Your database still thinks the site lives at the old domain, which can cause all sorts of redirect loops and broken images. You need to update two key entries to point to the new domain.
Back in phpMyAdmin on your new server, find the wp_options table (note: the wp_ prefix might be different on your site). Find the rows where the option_name is siteurl and home. Edit the option_value for both of these rows to be your new site's full URL.
This final change officially tells WordPress its new address. With that done, your manually cloned site should be fully up and running in its new home. You didn't just copy a site; you gained a much deeper understanding of how it all works.
Your Post-Cloning Checklist and Troubleshooting
You've successfully cloned your WordPress site, which feels great, but the job isn't quite over yet. Think of this next part as the final quality check before you can truly call it a day. A quick but thorough inspection now will save you from a world of headaches later.
Your cloned site might look pixel-perfect at first glance, but nasty surprises like broken links, dead forms, or security warnings could be hiding just out of sight. Skipping this final review can undermine all the work you just put in.
Let's walk through the essential checks and tackle the most common problems that tend to pop up after a clone.
The Essential Post-Clone Walkthrough
First things first, you need to make sure the core functions of the new site are actually working. Don't just look at the homepage—get in there and click around like a real visitor would. This is your best line of defense against migration gremlins.
Start with these key areas:
- Permalink Structure: Head over to
Settings > Permalinksin your WordPress dashboard. You don't need to change anything. Just click the "Save Changes" button. This one simple action flushes the site's rewrite rules and magically fixes a ton of 404 "Page Not Found" errors that are common after moving a site. - Internal Link Audit: Manually click through your main navigation menu. Then, dive into a few blog posts and pages to check the links within the content. You're looking for any links that accidentally point back to your old domain instead of the new one.
- Critical Functionality Test: If your site has interactive elements, test them all. Submit every contact form, sign up for your own newsletter, and—if you run an online store—go through the entire checkout process from adding an item to the cart to the final confirmation page. Make sure all the admin notifications and customer emails are firing correctly.
To build a solid routine for keeping your site running smoothly, you might want to follow a more structured guide. This WordPress maintenance checklist is a great resource for establishing those good habits.
Solving Common Cloning Conundrums
Even if you do everything by the book, you might still hit a few snags. Don't panic. These are common issues, and they're usually straightforward to fix once you know what to look for.
The most notorious is the "Error Establishing a Database Connection." This is WordPress's version of a check engine light. Nine times out of ten, it means you have a typo in your wp-config.php file. Carefully double-check the DB_NAME, DB_USER, DB_PASSWORD, and DB_HOST values. They must exactly match the credentials from your new hosting provider.
Another frequent problem is mixed content warnings, which can make your new site look insecure to visitors.
Fixing Mixed Content and Missing Images
Mixed content warnings pop up when a secure site (HTTPS) tries to load assets like images or scripts over an insecure connection (HTTP). This is a classic post-clone issue because old http:// URLs often get left behind in the database.
The fastest way to fix mixed content warnings is with a plugin like Better Search Replace. It lets you do a "dry run" first, showing you how many instances of
http://yourolddomain.comit finds before you commit to replacing them withhttps://yournewdomain.com.
This same search-and-replace method is your go-to for fixing broken or missing images. If your images aren't showing up, it's almost always because their URLs are still pointing to the old site. A thorough search-and-replace across your database, paying special attention to the wp_posts and wp_postmeta tables, will usually fix them right up.
Finally, don't forget to clear every layer of caching:
- Browser Cache: Your own browser might be holding on to old information.
- Plugin Cache: If you're using a caching plugin like W3 Total Cache or WP Rocket, purge its cache from the WordPress dashboard.
- Server-Level Cache: Many hosts, especially managed ones like WP Engine or Kinsta, have their own caching systems. You'll need to log into your hosting account to clear it.
By working through these steps methodically, you can be confident that your cloned WordPress site is a perfect, production-ready copy.
Cloning a WordPress Site FAQ
Even with the best guide in hand, you’re bound to have questions when cloning a WordPress site. It's a job with a few crucial steps, and getting the details right can mean the difference between a quick win and a long, frustrating afternoon. Here are some direct answers to the questions we get asked most often.
Think of this as your go-to reference for those "what-if" moments. Nailing these fundamentals is key to a successful clone that also protects your hard-earned SEO and keeps your site secure.
Will Cloning My WordPress Site Affect My Live Site's SEO
Cloning your site, by itself, is completely harmless to your live site's SEO. The danger creeps in if you make the clone public and search engines like Google find it. When that happens, you've got two identical, indexable versions of your website out there—a perfect recipe for duplicate content issues. This confuses search engines and can seriously hurt your rankings.
Luckily, the fix is simple and should be a non-negotiable part of your cloning process.
- Discourage Indexing: In the dashboard of your new cloned site, go to
Settings > Reading. Find the box that says, "Discourage search engines from indexing this site," and check it. This adds anoindextag to your site, telling Google and others to stay away. - Password Protection: For an extra layer of defense, use your hosting control panel to password-protect the directory where your clone lives. This puts up a hard stop for both search engine bots and curious visitors.
Once you’re ready for the cloned site to go live—maybe after a redesign or a move to a new host—you just uncheck that box and remove the password protection. Simple as that.
What Is the Difference Between a Backup and a Clone
This is a great question, mainly because the technical process for making a backup and a clone is almost identical. Both actions involve packaging up your site’s files and database. The real difference is all about their purpose and how you use them.
A backup is your safety net. It’s a static copy of your site, tucked away for one reason: disaster recovery. If your site gets hacked, a bad update breaks everything, or data is lost, you use that backup to restore the site to its last good state on the same domain.
A clone, on the other hand, is a living, breathing, fully functional copy of your website. You deploy a clone to a new location—a staging subdomain, a different domain, or a new server—to get actual work done.
Think of it this way: a backup is your insurance policy, stored in a safe for emergencies. A clone is a working prototype you take into the workshop to test, build, or prepare for a move.
Common uses for a clone include:
- Building a staging site to safely test plugin updates.
- Moving your website to a new host without any downtime.
- Working on a major redesign privately before revealing it to the world.
In short, a clone is just a backup that you actually turn on and use.
Can I Clone a WordPress Multisite Installation
Yes, you can absolutely clone a WordPress Multisite network, but be warned: the complexity takes a massive leap. Cloning a standard single WordPress site is pretty routine. Cloning a Multisite network is a different beast entirely.
The difficulty lies in its shared and interconnected database structure. All the sites in a Multisite network use a single database. Core user tables like wp_users and wp_usermeta are shared, while each sub-site gets its own set of tables (wp_2_posts, wp_3_options, and so on). This web of data is incredibly fragile and can easily break if the migration isn't handled with surgical precision.
While some powerful premium plugins like Duplicator Pro are built to manage Multisite migrations, trying it manually is really only for seasoned developers. It involves running precise find-and-replace scripts across dozens of database tables and having an expert-level grasp of the network's configuration.
For just about everyone else, using a specialized tool that is built for Multisite is the only reliable and safe way to go.
At WP Foundry, we build tools to make complex WordPress management tasks feel simple. Our desktop app gives you a single, clear dashboard to handle all your sites—letting you manage updates, backups, and security without the headache. Take back control of your WordPress workflow and see how much time you can save. Learn more about WP Foundry.