
Forgetting to back up your WordPress site is kind of like driving without a seatbelt. You might get away with it for a while, but when something goes wrong, it goes really wrong. A solid backup is your safety net, the one thing that turns a potential catastrophe into a minor hiccup.
Why You Absolutely Need a Backup Strategy
Sure, everyone knows backups prevent "data loss," but let's talk about what that actually looks like. I've seen a simple plugin update take down a massive e-commerce site right in the middle of a holiday sale. I’ve also had to tell a client that the high-ranking page they accidentally deleted was just… gone. These aren't just hypotheticals; they happen all the time.
Having a reliable backup process isn't just a technical task; it's what lets you sleep at night. It gives you the freedom to experiment, update, and grow your site without that nagging fear of one wrong click wiping out all your hard work.
The Wild World of WordPress
To really get why this is so critical, you have to appreciate the scale of WordPress. It’s the engine behind over 810 million websites, which works out to about 43.6% of the entire internet. With more than 70 million new posts going live every single month, it's a colossal ecosystem. You can get a better sense of WordPress's massive footprint over at MyCodelessWebsite.
But this massive, open-source world has its pitfalls:
- Plugins and Themes: There are nearly 60,000 free plugins out there. While that’s amazing for customization, every single one is a new variable. A buggy update can easily conflict with another plugin or your theme and bring the whole site crashing down.
- Malware and Hacks: Popularity makes you a target. WordPress is constantly being probed by bots and hackers looking for a way in. A security breach can corrupt your files, steal data, or get your site blacklisted.
- Human Error: It happens to everyone. You delete a file you thought you didn't need, or a snippet of custom code goes awry. Without a backup, a simple mistake becomes a permanent problem.
This is the homepage for WordPress.org, the hub for this entire community.
What you're looking at isn't just a website; it represents a global network of creators and businesses. Their entire digital presence relies on their WordPress installation running smoothly.
What It Really Costs to Not Back Up
Losing your website data is about so much more than a broken homepage. Think about the domino effect: you're losing sales, eroding customer trust, and taking a massive hit to your SEO rankings that you've spent years building. If you get hacked, Google might even blacklist your site, making it incredibly difficult for anyone to find you.
A good backup is your business continuity plan. It’s the difference between a server crash being a five-minute fix or a five-week nightmare of rebuilding everything from scratch.
Automating Your Backups with a Plugin
For most people running a WordPress site—from bloggers to small business owners—a good backup plugin is the way to go. It takes backing up your site from a manual, tedious chore and turns it into a set-it-and-forget-it safety net. Think of it as your website's insurance policy.
Using a plugin means you don't have to mess around with FTP clients or database tools like phpMyAdmin. Instead, you get a straightforward interface right inside your WordPress dashboard to handle everything. This is not just simpler; it’s also more reliable because it removes the chance of human error that can creep in with manual backups.
Getting Started with a Backup Plugin
The WordPress plugin library is packed with great options. For this walkthrough, we’ll use one of the most popular and trusted plugins out there: UpdraftPlus. With millions of active installations, its free version is more than powerful enough to get you started.
First, you need to install it. From your WordPress dashboard, head to Plugins > Add New and type "UpdraftPlus" into the search bar. When you see it, click "Install Now" and then "Activate."
Once it's activated, you'll find a new menu item under Settings > UpdraftPlus Backups. This is where you'll manage all your backups.
Comparing Popular WordPress Backup Plugins
Choosing the right plugin can feel overwhelming, but most top contenders offer similar core features. The differences usually come down to the user interface, storage integrations, and premium add-ons. Here’s a quick comparison to help you see how some of the most popular options stack up.
| Feature | UpdraftPlus (Free/Premium) | BackupBuddy (Premium) | BlogVault (Premium) |
|---|---|---|---|
| Ease of Use | Very user-friendly, intuitive interface. | Clean dashboard, but can have a slight learning curve. | Extremely simple, designed for non-technical users. |
| Storage Options | Excellent. Google Drive, Dropbox, S3, etc. (Free & Paid). | Good. Dropbox, S3, Google Drive, their own Stash service. | Excellent. Stores backups on its own secure servers, plus Dropbox/Google Drive. |
| Key Features | Scheduled backups, remote storage, basic cloning (premium). | Scheduled backups, staging sites, malware scanning, remote storage. | Incremental backups, built-in staging, malware scanning, real-time backups. |
| Cost | Robust free version; premium starts around $70/year. | Starts at $99/year. | Starts at $89/year. |
| Best For | Anyone needing a reliable, free, and easy-to-use solution. | Developers and agencies who need advanced features like staging and malware scans. | Hands-off users and businesses who want an all-in-one, managed backup service. |
While each has its strengths, UpdraftPlus is a fantastic starting point for most users thanks to its powerful free version. As your needs grow, you can always explore the premium features or switch to a more specialized service like BackupBuddy or BlogVault.
Configuring Your First Automated Backup
When you open the UpdraftPlus settings page, you'll see a big blue "Backup Now" button. It’s tempting to click it, but our main goal here is automation. Head over to the "Settings" tab to get your schedule locked in.
Here, you need to tell the plugin two key things:
- How often to back up your files (themes, plugins, uploads).
- How often to back up your database (posts, pages, settings, etc.).
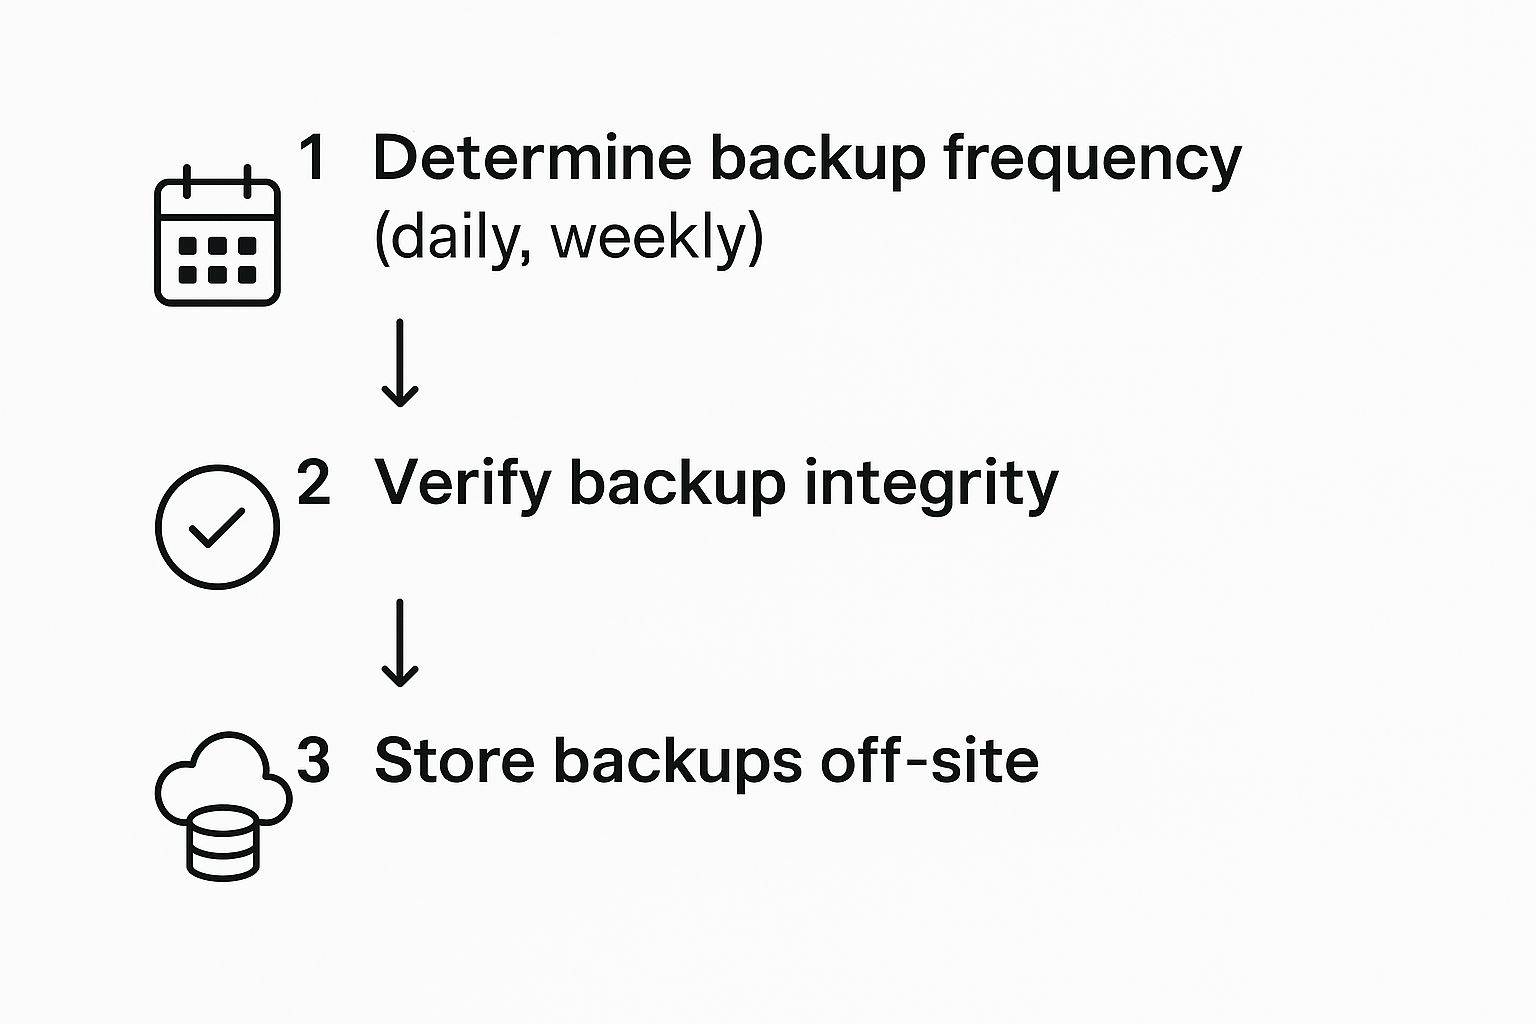
For most websites, setting the same schedule for both works just fine. The right frequency really depends on how often you update your site's content.
- Daily: A must for e-commerce stores, membership sites, or any site with frequent updates and user activity.
- Weekly: A great middle-ground for business websites or blogs that are updated a couple of times a week.
- Monthly: Only really suitable for static "brochure" sites that almost never change.
Set your schedules from the dropdown menus for both files and the database.
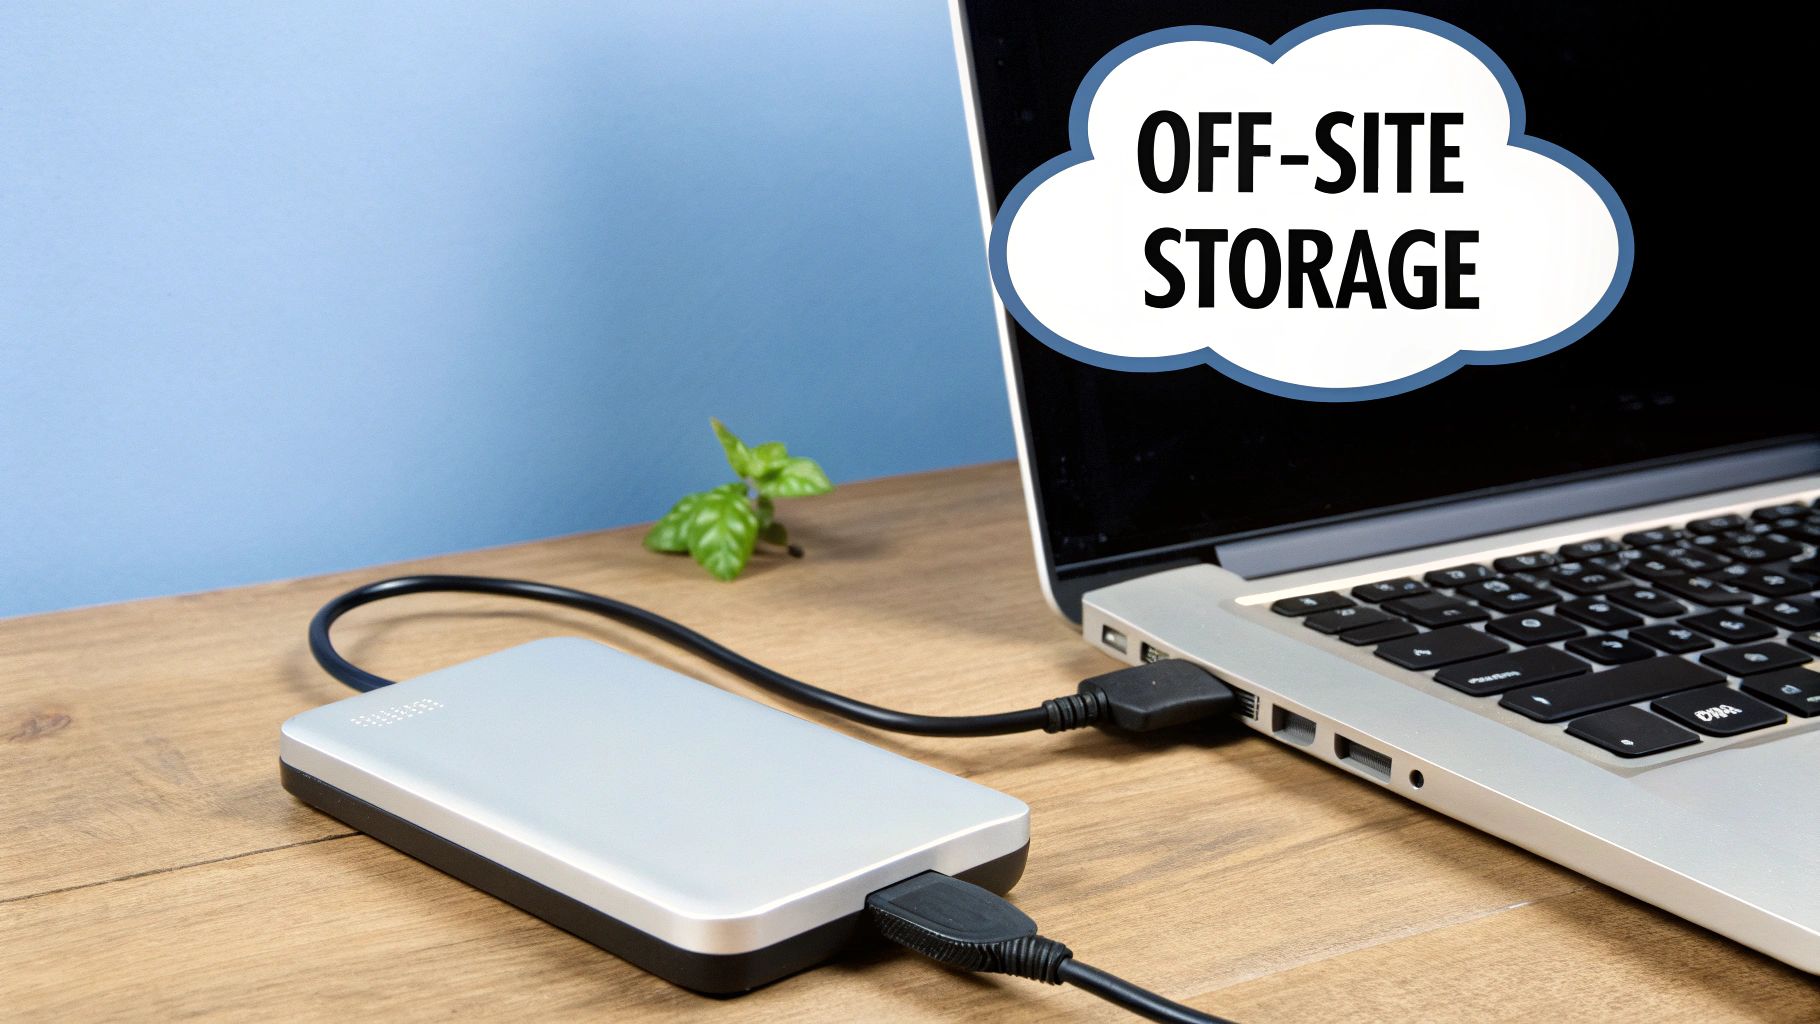
Connecting to Off-Site Storage
Here's the most important rule of backups: never store them on the same server as your website. If your server crashes or gets hacked, your backups will be gone along with your live site. Connecting to a remote storage location is non-negotiable.
UpdraftPlus makes this incredibly easy. In that same "Settings" tab, you'll see a row of icons for cloud storage services. Pick one you already use, like Google Drive or Dropbox.
Once you’ve made your choice, scroll down and hit "Save Changes." The page will refresh, and a new link will appear asking you to authorize UpdraftPlus to connect to your account. Follow that link, grant the necessary permissions, and you’ll be sent right back to your WordPress dashboard. It's a quick, one-time setup.
If you're looking for an alternative that manages backups from your desktop, you can also learn how to back up your WordPress site using our WP Foundry app.
With your schedule and remote storage all configured, you’ve successfully automated your backups. UpdraftPlus will now work quietly in the background, making sure you always have a recent, safe copy of your entire site.
Performing a Manual Backup Through cPanel
While plugins are fantastic for automation, every WordPress site owner should know how to perform a manual backup. It’s an essential skill. This hands-on approach gives you total control and is perfect for creating a one-off snapshot right before you do something major—like switching themes, updating your site's PHP version, or installing a complex new plugin.
Most web hosts provide a control panel called cPanel, which makes this whole process much more manageable. A full backup has two distinct parts: your website's files and its database. We'll go through each one separately to make sure you get a complete, working copy of your site.
Backing Up Your WordPress Files
First, let's grab all the files that make up the structure of your site. This includes the WordPress core files, your themes and plugins, and all your media uploads. Basically, it's everything that isn't stored in the database. The most direct route is through the cPanel File Manager.
Log into your hosting cPanel and look for the File Manager icon. Clicking it will open a new browser tab showing you the file system on your server.
Almost always, your website files will be inside the public_html directory. Double-click to go inside. You should see the familiar wp-admin, wp-content, and wp-includes folders. This is what you need.
Now, let's package them up.
- From the top menu, click Select All.
- With everything highlighted, find and click the Compress button.
- A small window will pop up. Choose Zip Archive as the compression type.
- Give the file a memorable name. I suggest something like
mysite-files-backup-DATE.zip. - Click Compress File(s).
The server will get to work creating a single .zip file containing your entire site. Once the process finishes, right-click on your new zip file and hit Download. Save it somewhere safe on your computer.
As a good housekeeping practice, remember to delete the zip file from your server after you've downloaded it to free up disk space.
Exporting Your WordPress Database
With your files safely downloaded, it's time for the second critical piece: the database. Your database is the brain of your site, holding every post, page, user account, comment, and configuration setting. Your files are just an empty template without it.
Head back to your cPanel dashboard and find the phpMyAdmin tool, which is usually under the "Databases" heading. This will open the database management interface.
Pro Tip: If you see multiple databases listed on the left and you’re not sure which one belongs to your site, here’s a quick way to check. Go back to the File Manager, open your
wp-config.phpfile, and look for the line that definesDB_NAME. The value in the quotes is the name of the database you need.
Once you know which database to export, just follow these quick steps:
- Select your WordPress database from the list on the left.
- Click the Export tab in the main menu.
- For almost every site, the Quick export method is all you need. This will package the database into a standard
.sqlfile. - Double-check that the format is set to SQL.
- Click the Export button.
Your browser will now download the .sql file. Store it in the same folder as the .zip file backup you just created. And that's it! You now have a complete manual backup of your WordPress site. This technique of handling the database separately is incredibly useful, and you can learn more in our dedicated guide on how to back up a WordPress database.
By keeping both the zipped files and the SQL export together, you have everything you need to fully restore your website on any server, giving you a solid safety net against any potential disaster.
Advanced Command-Line Backups for Developers
If you're a developer or a sysadmin, clicking around the WordPress dashboard to run a backup can feel painfully slow. When you need raw speed, absolute control, and the ability to automate everything, the command line is your best friend. This approach completely bypasses the WordPress UI, giving you direct server-level access to your site's files and database.
Let's be clear: this method isn't for everyone. But if you're comfortable with SSH and know your way around a terminal, it's a far more efficient way to work. It's the perfect setup for managing a whole fleet of sites, baking backups into your deployment scripts, or just having a solid server-side process that doesn't depend on a plugin.
Using WP-CLI for Lightning-Fast Backups
The heart of command-line WordPress management is WP-CLI, the official WordPress Command-Line Interface. If it's not already installed on your server, you're missing out. With WP-CLI, jobs that take multiple clicks in the admin panel boil down to a single, clean command.
First thing's first: you'll need to SSH into your server. Once you have a secure connection and you've navigated to your WordPress root directory (often public_html), you're ready to go.
The most critical piece of any backup is the database, and WP-CLI makes exporting it dead simple. Just run this command:
wp db export your-database-backup.sql
That one line tells WP-CLI to grab your database credentials from wp-config.php, connect, and dump the entire database into a .sql file right where you are. It's blazing fast and sidesteps the timeout errors that often plague large database exports through tools like phpMyAdmin.
With the database saved, you need to archive your website files—your themes, plugins, uploads, everything. The classic tool for this is tar, a command-line utility for creating compressed archives.
You can package your entire WordPress directory with a command like this:
tar -czvf your-site-files.tar.gz .
This command tells tar to create (-c) a gzipped archive (-z), show the progress as it works (-v), and save it to a file (-f) named your-site-files.tar.gz using the current directory (.) as the source. Now you have two files—your database export and your file archive—that together form a complete snapshot of your site.
Automating Backups with Cron Jobs
Running backups manually from the command line is already a big improvement, but the real power is in automation. That's where cron jobs come into play. Cron is the built-in job scheduler on Unix-like systems, and it lets you run scripts automatically at any interval you choose.
You can combine the commands we just used into a simple shell script. Create a file called backup.sh and add this:
#!/bin/bash
DATE=$(date +"%Y-%m-%d")
wp db export "backup-db-$DATE.sql"
tar -czvf "backup-files-$DATE.tar.gz" .
Make the script executable with chmod +x backup.sh, and then you can set up a cron job to run it for you. This gives you a completely hands-off system for backing up your WordPress site right on the server.
Using Rsync for Efficient Incremental Backups
For huge websites or sprawling multisite networks, creating a full archive every night can chew through disk space and spike server load. A much smarter approach is using rsync for incremental backups. rsync is a powerful tool that syncs files between two locations, but it's intelligent enough to only transfer the changed parts of files.
Using
rsynctransforms your backup strategy from creating bulky, full archives to maintaining a lean, up-to-date mirror of your site. This is a game-changer for managing storage and reducing server load.
A common rsync command to back up your files to another server might look something like this:
rsync -avz -e "ssh" /path/to/wordpress/ user@remote_server:/path/to/backups/
This command syncs your WordPress directory over SSH to a remote backup destination. It archives the files (-a), shows you what's happening (-v), and compresses the data to speed up the transfer (-z). When you pair this with a daily database dump, you get an incredibly efficient and robust backup solution managed entirely from the command line.
Smart Backup Storage and Management Practices
Getting the backup file created is only half the job. A truly solid backup strategy really comes down to where you store those files and how you look after them over time. Without smart storage, even a perfect backup might be useless right when you need it most.
Think about it: keeping your only backup on the same server as your live site is like hiding your spare key under the doormat. It feels safe, but that security vanishes the second you run into real trouble, like a server crash or malware infection.
The 3-2-1 Rule of Backups
To build a genuinely reliable system, we can follow an industry-standard idea called the 3-2-1 Rule. It’s a simple but incredibly effective framework that protects your data from almost any single point of failure.
Here’s how it works:
- You should have three total copies of your important data. This means your live site plus at least two backups.
- Your backups should be on two different types of media. For instance, you could keep one copy on a cloud service like Google Drive and another on a local external hard drive.
- At least one of those copies needs to be stored off-site. This is the critical piece that protects you from local disasters like a fire, server room flood, or a catastrophic hardware failure affecting the whole data center.
Following the 3-2-1 Rule turns your backup from a simple file into a proper disaster recovery plan. It’s the professional standard because it just plain works.
This approach means that no single event can wipe out all your work. If your cloud storage gets hacked, you have the local copy. If your office hard drive dies, the off-site cloud copy is still safe.
Choosing Your Off-Site Storage Location
Sending your backups to a remote location is a must. The good news is that modern backup plugins and services make this incredibly easy to automate. Here’s a quick look at the most common options.
| Storage Type | Best For | Pros | Cons |
|---|---|---|---|
| Consumer Cloud Storage (Google Drive, Dropbox) |
Beginners, Bloggers, Small Businesses | Easy to set up, often free or low-cost | Limited storage, not built for backups |
| Enterprise Cloud Storage (Amazon S3, Wasabi) |
Developers, Agencies, E-commerce Sites | Highly scalable, durable, cost-effective | More complex setup, pay-as-you-go pricing |
Services like Google Drive or Dropbox are great starting points. They connect with most backup plugins right out of the box and give you a dependable off-site spot for your files.
For developers or businesses with bigger sites, Amazon S3 offers serious, enterprise-grade durability at a surprisingly low price, making it a go-to for anyone who is serious about their backup strategy.
The Most Overlooked Step: Testing Your Backups
Let's be honest: an untested backup isn't really a backup. It's just a hope and a prayer. The only way you can be absolutely sure your files aren't corrupted and the restoration process actually works is to try it.
This doesn't mean you have to overwrite your live site. The best way to do this is to restore your backup to a staging environment or a local development machine. This lets you check that both the files and the database are working perfectly, all without any risk. For a full walkthrough, our guide on how to restore a WordPress site from a backup gives you the step-by-step.
Setting a Realistic Retention Policy
Finally, you need a plan for how many old backups to keep. Storing every single backup forever is a quick way to run out of storage and create a management nightmare. A good retention policy finds the right balance.
A common and effective strategy is:
- Keep daily backups for the last seven days.
- Keep weekly backups for the last four weeks.
- Keep monthly backups for the last three to six months.
This setup gives you plenty of restore points to choose from, whether you need to undo a small change from yesterday or recover from a major issue that happened a few months back. Most good backup plugins let you configure these rules to run automatically, keeping your storage tidy without you having to lift a finger.
Common Questions About WordPress Backups
Once you get the hang of the different ways to back up a WordPress site, a few practical questions almost always pop up. Nailing down these details is what turns theory into a real-world backup strategy you can actually count on.
Let's dig into the questions I hear most often.
How Often Should I Back Up My WordPress Site?
There’s no magic number here. The right backup schedule comes down to one simple question: how much data can you afford to lose? Your answer dictates how often you should be saving a copy of your site.
- Daily Backups: For any dynamic site, this is the bare minimum. If you're running an e-commerce store taking orders, a busy blog, or a membership site with active users, a daily backup is essential.
- Weekly Backups: This is often the sweet spot for business or portfolio sites that don't change constantly. If you're just adding a blog post or tweaking a page once or twice a week, a weekly snapshot is probably enough to avoid major headaches.
- Real-Time Backups: For mission-critical sites, especially in e-commerce where every transaction counts, real-time is the gold standard. These services save every change the moment it happens, pretty much eliminating the risk of data loss.
What Is the Difference Between Files and a Database?
Getting a handle on the two pieces of your website is key to a successful backup. A good way to think about it is like a car.
Your WordPress files are the car's physical structure—the engine, the chassis, the wheels. This includes the WordPress core software, all your theme files that create the design, every plugin you’ve installed, and your media library (images, videos, etc.).
The WordPress database, then, is the driver and all the crucial information. It holds your content like posts and pages, user comments, website settings, and all that e-commerce product data. It’s the dynamic content that makes the site yours.
You absolutely need both. Restoring just the files is like having a car with no driver and no destination. Restoring only the database gives you information with no structure to display it. A complete backup always has both.
Can I Just Use My Web Host's Backups?
Relying entirely on your host’s backups is a risky move. While they’re a nice fallback to have, they should never, ever be your only line of defense.
The biggest issue is control. You don't choose when the backups happen, getting access to them can be a hassle, and a restore often means waiting on a support ticket. When your site is down, that's time you just don't have.
A web host’s backup is there to protect their infrastructure. Your independent, off-site backup is there to protect your business. Never confuse the two.
Worse, if their server fails, their security is breached, or your account gets suspended, you could lose everything—including those backups they were holding for you. Always keep your own copies somewhere else.
Why Is Storing Backups on My Server a Bad Idea?
Keeping your backups on the same server as your live site is like hiding your spare key under the doormat. It’s a classic single point of failure.
Think about it: if your server crashes, gets hacked, or falls victim to ransomware, what gets hit? Your live site and every single backup you've stored there. They'd all be gone in an instant, defeating the whole purpose of making backups in the first place.
The cornerstone of any solid backup plan is redundancy and separation. Your backup files must live in a totally separate, secure location. That way, even if your server is completely wiped out, you have a clean copy ready to go. That's real disaster recovery.
Take control of your website's safety and simplify your entire management process. With WP Foundry, you can perform database backups, manage plugins and themes, and scan for vulnerabilities across all your sites from one powerful desktop app. Check out how WP Foundry can streamline your WordPress workflow.